Mix and match pencil skirt

different fabrics

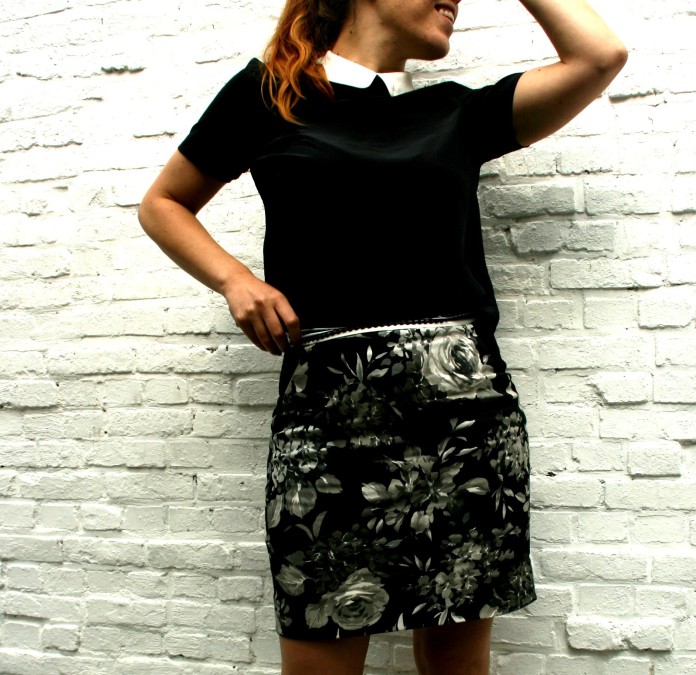
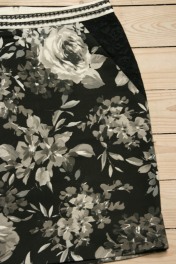
I will always have a reason to stash small pieces of leftover fabrics and I believe my excuses are truly valid.  I use leftovers for linings, for contrast trims, for covering buttons, for bows or any other detail I can think of.  Possibly not everyone in our family shares this love, but I love going trough my bits and pieces.  My new pencil skirt is about mixing and matching fabrics within the same colour range.  I used this black and white cotton flower print, mixed with some leftover uni cotton for the waistband and lace to make this design.  At the waistband I sewed on two strokes of a vintage lace ribbon which I found at the fleamarket of ‘Porte de Clignancourt’ years ago.  You see, eventually everything will get its purpose!

IMG_7106B

IMG_7138B

sewing machine

rokjeIMG_7175

Easy pattern DIY: For this skirt I made a slant cutting into a basic skirt pattern .  That’s it!


And one for my instagram followers 😉

mix and match skirt fitting


Standard

Get the most out of a little piece of fabric…

my little girls printed dress

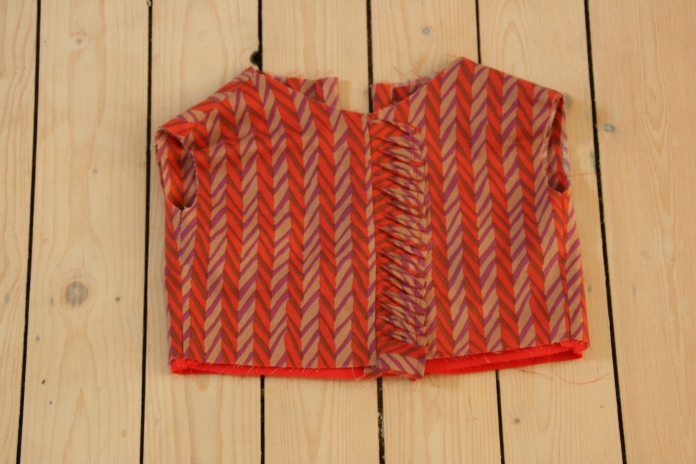
A little piece of cotton fabric was elbowing for weeks to get out of the shelf.  When I bought it I imagined a cute 50’s dress for my daughter, you know, the kind of dress little girls like to spin around in, and the kind of dress that reminds me of my own twirling as a child. Unfortunately, When I got home, ready to make my beautiful dress, I noticed the fabric width was too small for my design. So goodbye dress, goodbye sweet memories, or maybe not?  After a great deal of thinking I came up with the idea of using a seam at the center front of the bodice.  And actually it was a change for the better…

DeocrativeScissors-0610

Een klein stukje stof lag reeds een paar weken te dringen om uit de kast te komen.  Toen ik dit stofje kocht had ik zo’n schattig jaren 50 jurkje voor mijn dochter in gedachte, zo’n jurkje waar kleine meisjes graag eindeloos mee rondzwieren, zo eentje dat doet denken aan mijn eigen ronddartelen als kind . De teleurstelling was dus groot toen bleek dat de stofbreedte van dit mooie katoentje ter smal was voor mijn ontwerp.  Vaarwel jurkje en vaarwel zoete herinneringen, of toch niet?  Na heel wat gepeins kwam ik dan op het idee om met een middenvoornaad te werken voor het lijfje.  Dat bleek achteraf nog een heel leuke inslag…

sewing machine

IMG_4809

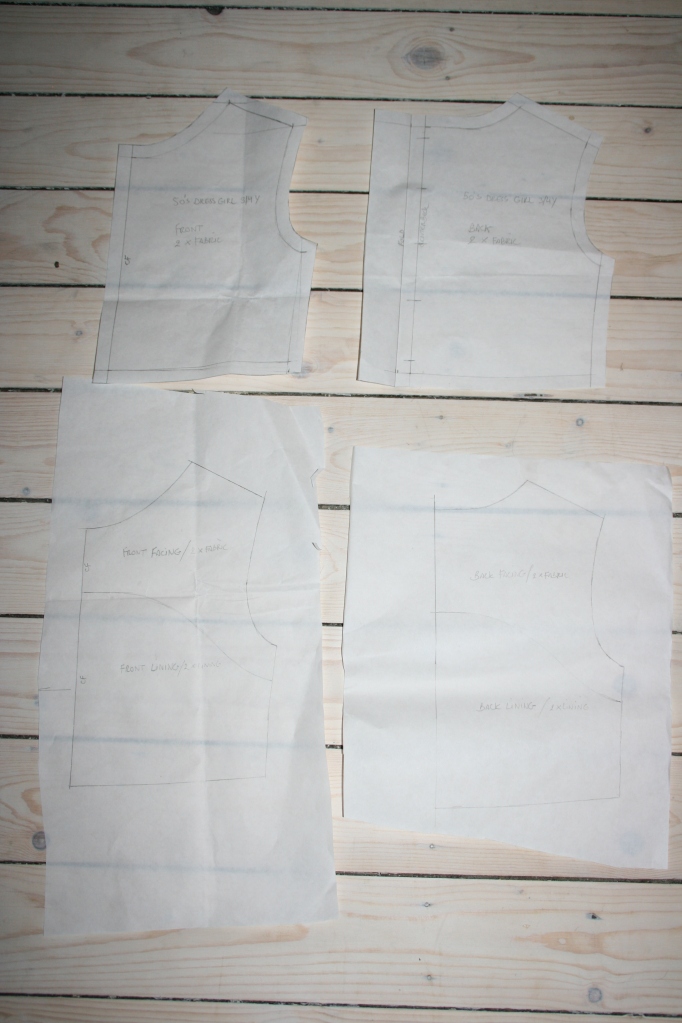
This is the pattern for the bodice of the dress.  I used the following measurements for this pattern: Chest width: 62cm – Waist: 56cm – Shoulder to waist: 24,5cm – Armhole: 11,5cm – Neckopening: 14cm – drop by 5,5cm. This is for a size 3/4 years old.  I add 1cm of seam allowance and 3cm at the center back with buttons.

IMG_4811

I copy the pattern for the facing and lining.

IMG_4829

This is my magic bucket of fabric leftover. I found this nice red cotton for the lining, a perfect match!

IMG_4837

So this is how it all comes together.  I draw chalk lines for the skirt of the dress: 2 pieces of 33cm (includes seam allowance 1+3cm) and all that is left of the fabric width.  I draw another chalk line at 7cm to make the fancy trim at center front seam.

IMG_4839

The trim is finished at one side with a roll seam of 0,5cm.

IMG_4844

I use my iron to make pleats.

IMG_4847

All pieces are sewn together, the outer shell and the facing/lining exept for the center front.

IMG_4851 IMG_4852

I pin the trim on one side of the bodice and close the center front.

IMG_4854 IMG_4860

Now I fix pleats in opposite direction with a top stitching.

IMG_4866

I sew the outer bodice and lining bodice together at the middle back and I close shoulder seams (bodice and lining separately)

IMG_4867

IMG_4870

I close the neckline of both layers.

IMG_4871

I close armholes of both layers on front and repeat this for the back. I stitch from the inside, not as shown here!

IMG_4872

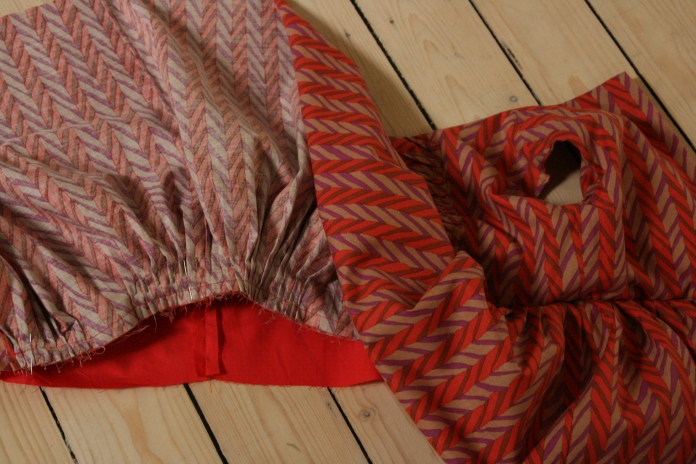
For the skirt a close side seams (not the center back) and gather the pieces for the skirt to match the width of the bodice.  For this particular fabric I’m using pleats again instead of a gathering.  I attach the skirt onto the bodice outer shell. Then I fix the inner shell by stitching from the outside on the seam between skirt and bodice. (to hide inner seam)  I’m closing the lower part of the skirt at center back and finish the hem.  Finally I’m adding buttons and buttonholes at center back.

girls dress

sketch 50's dress

Standard

Upcycled leather skirt

leather skirt close up

I love to stroll around on markets, always in search of vintage belts, purses and gloves.  Last week I found this lovely leather skirt in superb condition.  The seller, a very proud lady, said she used to wear this and maintained it with leather grease as she saw me looking at it and touching the leather.  I just couldn’t resist to buy it and because she was so persistent about the good quality I couldn’t haggle either.  She’s probably very good at selling her things… Anyway, a leather mini was still missing in my wardrobe!

DeocrativeScissors-0610

Vlooienmarkten afstruinen is echt mijn ding, altijd op zoek naar ceintuurtjes, handtassen en handschoenen.  Vorige week vond ik dit fantastische koopje, een leder rok in super conditie. De verkoopster, een fier madammeke, vertelde me dat ze deze rok vroeger droeg en onderhield met ledervet toen ze me zag kijken en het leder betasten.  Ik moest die rok kopen en omdat ze zo overtuigend was over de goede kwaliteit durfde ik niet meer afdingen.  Ze is waarschijnlijk zeer winstgevend in de verkoop van haar spullen.   In ieder geval, een mini leder rok ontbrak nog aan mijn garderobe…

sewing machine

IMG_4682      IMG_4686

Determine the desired length and add 3cm seam allowance.  Use chalk to mark where to cut.

IMG_4688

Fix the hem with Pattex.  Maybe leather glue would have been better but this worked really well.  Don’t overdo it though.  Fold over the seam allowance and press well to get a nice clean seam.

leather skirt close up

I could have stopped here and that would have been great too but I decided to add something extra.

IMG_4778

Why not use the hem leftovers?

IMG_4779

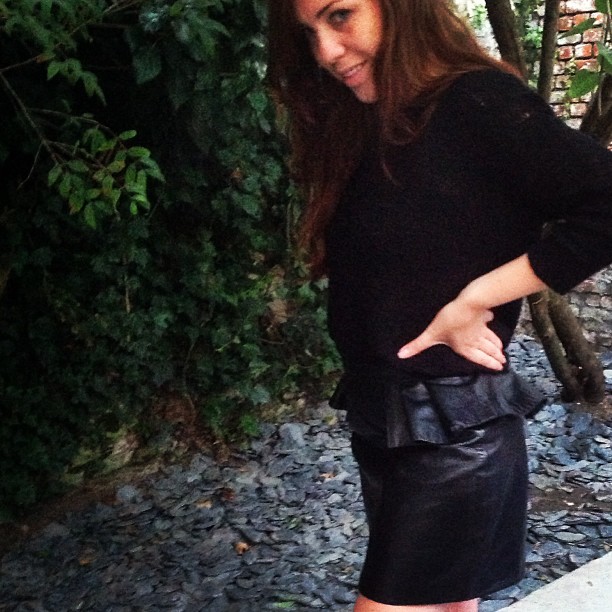
I want to use the back finish of the slit in the front.   I cut the hem in 2 equal pieces.  They are pleated and sewn on just below the waistband. Not that easy to stitch but with some patience and good needles…

leather peplum close up

picture leather peplum

Standard

The basic pencil skirt pattern

tutorial basic skirt

I already promised this a few weeks ago on my Facebook page and finally here it is: the basic pencil skirt pattern.  This is a must have to make most skirt designs and absolutely easy to make.   A rectangle will form the basis again for this easy pattern,  based on the measurements of my hips , I add darts at the waist et voila: skirt finished!  I had to make some adjustments after sewing the first skirt because it was too wide at the waist.  Once the fitting is perfect, I can try out new skirt lengths, asymmetric hems, add seams or create different volumes. I hope to show you some interesting modifications very soon but for now I enjoy the simple cut of this basic pencil skirt.

DeocrativeScissors-0610

Zoals ik al een paar weken geleden beloofde op mijn Facebook pagina is het nu eindelijk daar: het basis kokerrok patroon.  Dit patroon is onmisbaar als basis voor de meeste rokontwerpen en absoluut éénvoudig.  Een rechthoek zal opnieuw de basis vormen van dit eenvoudig patroontje gebaseerd op de omtrek van mijn heupen , daarna wat nepen toevoegen in de taille en voila, rokje klaar!  Ik geef toe dat ik het patroon wat moest aanpassen want het was me ietwat te breed.  Eens ik de perfecte pasvorm heb kan ik spelen met roklengtes, asymmetrische zomen, naden toevoegen en andere volumes creëren.  Alles is mogelijk en ik hoop jullie snel een aantal interessante varianten te tonen maar nu geniet ik van de eenvoudige snit van deze basis kokerrok.

sewing machine

pattern pencil skirt  paspop rok

A= Waistline : 4 + 0,25cm (make 0,5cm smaller for cotton stretch)

B= Hip width : 4 + 0,5cm (make 0,5cm smaller for cotton stretch)

C= distance between hips and waist

(Tip: don’t stretch the meter too tight around waist and hips)

IMG_2885

1) Make 2 rectangles starting from width B (hips): 1st rectangle=half front + 2nd rectangle= half back.  Go down from A with length C to mark the hipline B  

1) Maak 2 rechthoeken op breedte B (heupen): 1ste rechthoek=een halve voorzijde + 2de rechthoek= een halve rug.  Ga vanaf lijn A naar onder met lengte C om de heuplijn B te bepalen.

IMG_2908  pencil skirt back

2) Add darts and curve the side seams to shape the waist A.  The difference between hips (B) and waist (A) will determine the width of the darts, darts are longer and wider at the back. (later on I changed the pattern and used 2 darts at the back because the difference between my waist and hips was too big) Dropp the waist A by 1cm at the center front and 0.5cm at the back, create a curve for a more natural waistline.

2) Voeg neepjes toe en rond de zijnaad af om zo een taille te vormen.  Het verschil tussen heupen (A) en taille (B) zal de breedte van de nepen bepalen, nepen zijn dieper en breder op de rug. (ik heb nadien het patron aangepast en 2 nepen gebruikt omdat het verschil tussen mijn heupen en taille te groot was)  Ga 1cm naar beneden op middenvoor A en 0,5cm op middenrug A.  Voor een meer natuurlijke belijning in de taille krijgt lijn A een zachte ronding.

IMG_2912

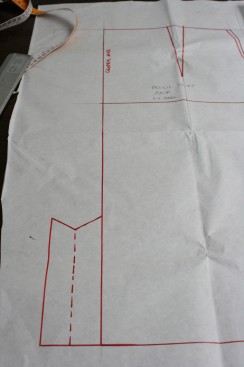
3) Choose a good length for your skirt. (measure from waist A down).

3) Kies de juiste lengte voor je rok.  (meet vanaf taille A naar onder toe)
IMG_2913

If the fabric doesn’t stretch you can make a vent at the centerback. – Als je stof niet rekt kan je opteren voor een split op de middenrug

IMG_2915  IMG_2914

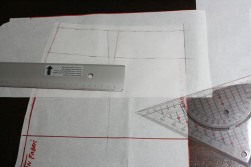
4) Ad seam allowance, 4cm for the hem and 1cm for all other seams.  No seam allowance at center front, the pattern is placed at the fabric fold.

4) Voeg naadwaarde toe, 1cm voor alle naden en 4cm voor de zoom. Er is geen naadwaarde nodig op midden voorpand, het patroondeel wordt tot tegen de stofvouw gelegd.
IMG_2922  IMG_2924

5) Make a facing for the waist by copying the waistline A and go down by 8cm.  Close the darts with tape and make a soft curvy line.  Add 1cm seam allowance.

5) Maak een beleg voor de taille door het patroon te kopiëren vanaf de taille A tot 8cm naar onder.  Kleef de nepen dicht met papiertape en herteken tot een zachte afgeronde vorm.  Voeg 1cm naadwaarde toe.

IMG_2926

The pattern is finished, now you can start sewing.  The back will need a zipper and you can find a lot of great blogs on how to do this.  I advise you to finish al seams with a zigzag before stitching the skirt.

Het patroon is klaar, nu kan je starten met naaien.  Er zal een rits nodig zijn op middenrug en met reeds een hoop fantastische blogs over dit onderwerp zal dit geen probleem meer geven. Ik raad je aan alle patroondelen eerst te zigzaggen vooraleer het rokje in elkaar te stikken

Good zipper tutorials:

Englisch (www.makeit-loveit.com)

Dutch (www.madamezsazsa.blogspot.be)

* I’m still looking for good tutorials on invisible zippers, let me know if you have a good one!

Standard