The zigzag dress

IMG_6386

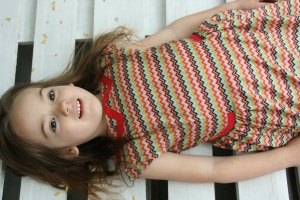
The weather is finally improving and so is my mood for sewing.  Although this means I’m spending more time behind my sewing machine rather than enjoying a gin tonic on my terrace…  But that’s okay, I’m just enjoying it so much.  Nice weather calls for sweet summer dresses!  I’m reworking the LBD I made a few weeks ago in a summer version of colourful Zigzag stripes, adding some contrast ribbon and using my daughter as my muse.  Fortunately she’s enjoying it as much as I do…

IMG_6326

The pattern is the same as the black button dress, but now I’m using a red cotton ribbon to finish the seams at the waist.

IMG_6331  IMG_6333  IMG_6339

I stitch the ribbon onto the bodice and onto the skirt to create a contrasting detail at the waist .  After that I stitch the vertical dart, the ribbon ends are now nicely finished between this seam.

zigzag dress with fake collar  my girl wearing the zigzag dress

I had a last minute inspiration and created a fake collar with the leftover from the cotton ribbon, I thought it would look great with the zigzag print.

IMG_6394 IMG_6424

IMG_6450 IMG_6488

IMG_6408

So proud of my work, I’m having this gin tonic after all!

Standard

The chic and easy joggers tutorial

My sporty chic pants

This tutorial is about how to make a loose and easy trouser that looks elegant at the same time.  It’s a little like jogging pants but with a more fitted leg.  Making well fitted pants is rather complicated but this pattern is very executable.  I used a fine wool crepe with a satin waistband to create a simple, yet effortlessly chic look.  I hope you can easily follow my instructions and make yourself a cool pair of joggers.

sewing machine

IMG_6239

I measure my hip width and add 8cm.  I divide this by 4 and mark this on my pattern, this is the red line as you can see here.  The vertical lines mark the middle front and the side seam of the trouser.

IMG_6244

I take an existing pants with a more loose fit (not too oversized). I copy the crotch of the front by laying it at the middle front seam just below the waistband and going down following the curve of the original pants.

IMG_6246    IMG_6248

I draw a second horizontal line starting from the crotch.  When dividing this line in 2 you mark the middle of the leg.

I use this line to draw the knee and the hem of my pants.  The width for the hem is my ankle width + 8cm divided by two.  The inside seam of the trouser leg is 64cm.  Now I can connect all these points by drafting a flowing line.

IMG_6251

I draw a slight curve from the hip towards the waist going up by 1cm.

IMG_6252 IMG_6254 IMG_6253

For the backside of the pants I copy the front and cut into the pattern at the hip line.  I use the existing trousers again and copy the middle back seam just below the waist to the crotch.

IMG_6258

I make flowing lines at the side seam and from the back crotch to the knee.  It’s important to keep the same length on the side seam and the inner leg seam to keep the leg balanced.  Now your pattern is finished, you just need to add seam allowance everywhere.  I use 1 cm of seam allowance on all seams and 6cm at the leg hem for the elasticated cuff.

IMG_6264

I’m using this beautiful fluid wool crepe and sew everything accordingly. The width of the waistline on my pattern is the same width to create a straight waistband in black satin.  When stitching it onto the pants I leave the waistband open for 12cm at the middle back for the elastic band.

waistband pants handmade buttons

There are no darts in this pattern.  To make it fitted at the waist without using an elastic band all way round I made some buttonholes on the front. The buttons will create a pleat on both sides.  On the middle back of the waistband I only use 15cm of elastic band.

The buttons are handmade with the black wool I used for the pants.  Because these button kits never seem to work (it’s probably just me…) I sew the fabric buttons by hand.

IMG_6287    jogging pants frontjogging pants back

My new joggers!  They fit perfectly and look so classy in this light wool crepe. I do think by using a colourful printed cotton with a fully elasticated waistband it will look amazing as well.  A leopard print or a bright flower print, oooh yes…

Standard

Old one out, new one in!

IMG_4884

There are dresses hanging in my wardrobe for ages waiting to be worn again.  I keep pulling them out and hanging them back, wrong colour, wrong shape, wrong something are keeping me from wearing them again.  I never get rid of them and it seams funny somehow in this throw-away society and fast fashion decade.  It’s against my nature and my love for clothes to remove them but keeping things is also holding on to the past.  Sometimes it’s good to let go though, finally I will repurpose this lime dress.  My daughter will look absolutely stunning in this colour.

sewing machine

IMG_4889

I start by comparing all measurements of my dress with her dress.  I think it’s good to keep as many seams from the original.  It will spare me some time but also avoid damage on the fabric.  I decide to keep the original neckline because of the pleating and the back slit.

IMG_4894

The front and backside of the dress are separated by cutting the side seams and shoulders.  As you can see the lining is still fixed at the neckline.

IMG_4896

I cut of at the shoulders to make a smaller neck opening.  From the new shoulder I measure the total length (+3cm seam) I need for the little dress and cut of the hem.

IMG_4899

To make a smaller armhole I have to reduce the width. I’m cutting of at the side seams.

IMG_4901

The neckline was still too big and I resolved this by adding an extra pleat with a topstitch on both sides.  When repurposing old clothes you need to be inventive and find creative solutions because the dimensions will never be perfect.  That’s what’s actually the most fun.  You can never entirely predict your end result.

IMG_4904

The most tricky part is to assemble everything in a beautiful manner.  I close side seams from the outer shell fabric and the lining separately.  After that I finish the armhole by stitching the fabric and the lining together from the inside.

IIMG_4985

The neckline was still too wide, I added more pleats at the middle front and topstitched it.

IMG_4996

And finally I make a tunnel at the waist for the fabric belt.  I start by making a buttonhole at the middle front in the upper fabric layer.  Then I stitch on top of both layers (lining + fabric) creating a tunnel.  I shortened the original belt length and pull it trough the buttonhole.  After that I finish the hem of the fabric and lining separately.

repurposed dress

My little girl has a new dress to enrich her wardrobe and it doesn’t seem like there’s something missing in mine.

xxx

Made By Me

Standard

Get the most out of a little piece of fabric…

my little girls printed dress

A little piece of cotton fabric was elbowing for weeks to get out of the shelf.  When I bought it I imagined a cute 50’s dress for my daughter, you know, the kind of dress little girls like to spin around in, and the kind of dress that reminds me of my own twirling as a child. Unfortunately, When I got home, ready to make my beautiful dress, I noticed the fabric width was too small for my design. So goodbye dress, goodbye sweet memories, or maybe not?  After a great deal of thinking I came up with the idea of using a seam at the center front of the bodice.  And actually it was a change for the better…

DeocrativeScissors-0610

Een klein stukje stof lag reeds een paar weken te dringen om uit de kast te komen.  Toen ik dit stofje kocht had ik zo’n schattig jaren 50 jurkje voor mijn dochter in gedachte, zo’n jurkje waar kleine meisjes graag eindeloos mee rondzwieren, zo eentje dat doet denken aan mijn eigen ronddartelen als kind . De teleurstelling was dus groot toen bleek dat de stofbreedte van dit mooie katoentje ter smal was voor mijn ontwerp.  Vaarwel jurkje en vaarwel zoete herinneringen, of toch niet?  Na heel wat gepeins kwam ik dan op het idee om met een middenvoornaad te werken voor het lijfje.  Dat bleek achteraf nog een heel leuke inslag…

sewing machine

IMG_4809

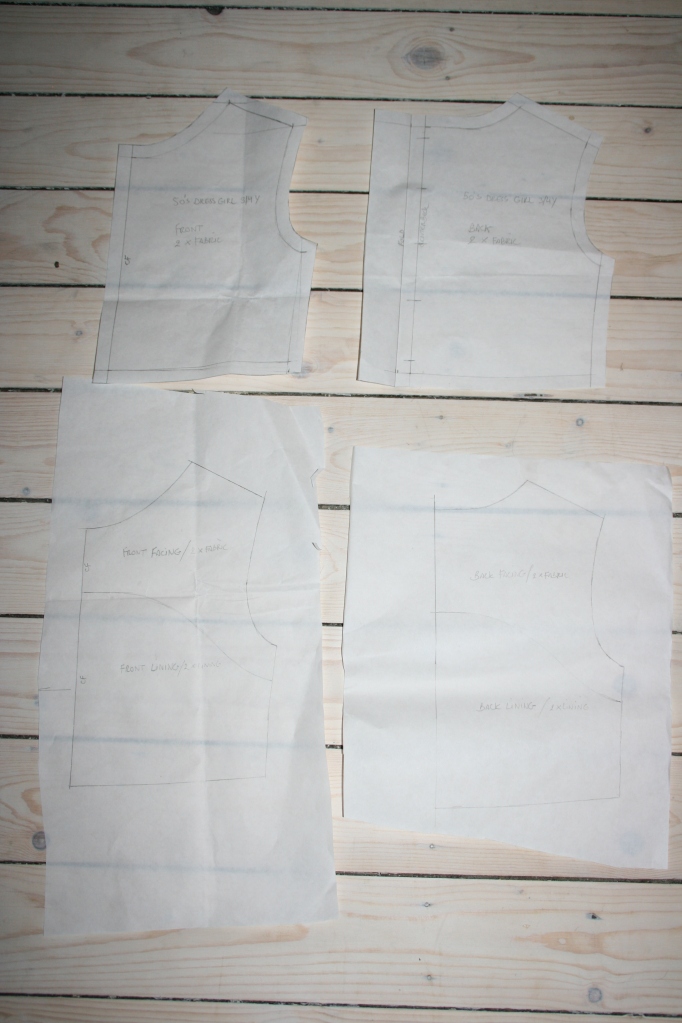
This is the pattern for the bodice of the dress.  I used the following measurements for this pattern: Chest width: 62cm – Waist: 56cm – Shoulder to waist: 24,5cm – Armhole: 11,5cm – Neckopening: 14cm – drop by 5,5cm. This is for a size 3/4 years old.  I add 1cm of seam allowance and 3cm at the center back with buttons.
IMG_4811

I copy the pattern for the facing and lining.

IMG_4829

This is my magic bucket of fabric leftover. I found this nice red cotton for the lining, a perfect match!

IMG_4837

So this is how it all comes together.  I draw chalk lines for the skirt of the dress: 2 pieces of 33cm (includes seam allowance 1+3cm) and all that is left of the fabric width.  I draw another chalk line at 7cm to make the fancy trim at center front seam.
IMG_4839

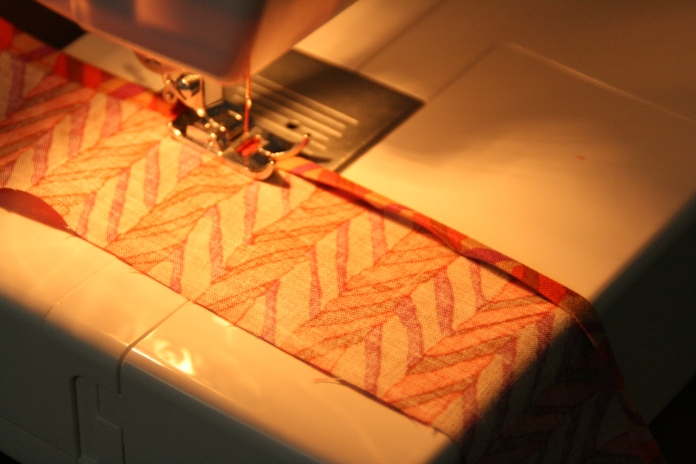
The trim is finished at one side with a roll seam of 0,5cm.

IMG_4844

I use my iron to make pleats.

IMG_4847

All pieces are sewn together, the outer shell and the facing/lining exept for the center front.

IMG_4851 IMG_4852

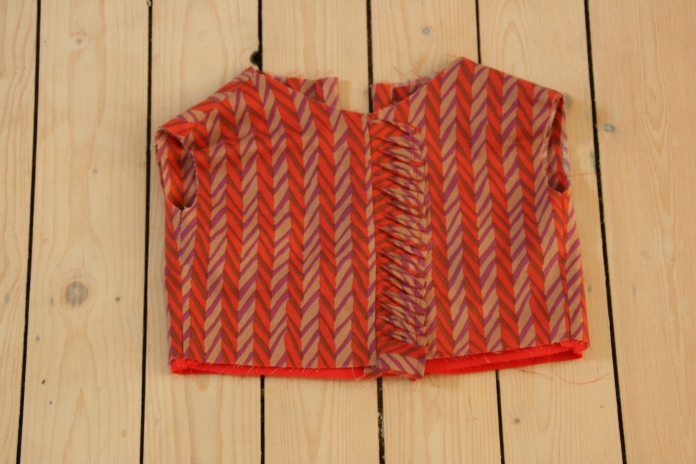
I pin the trim on one side of the bodice and close the center front.

IMG_4854 IMG_4860

Now I fix pleats in opposite direction with a top stitching.

IMG_4866

I sew the outer bodice and lining bodice together at the middle back and I close shoulder seams (bodice and lining separately)
IMG_4867

IMG_4870

I close the neckline of both layers.

IMG_4871

I close armholes of both layers on front and repeat this for the back. I stitch from the inside, not as shown here!
IMG_4872

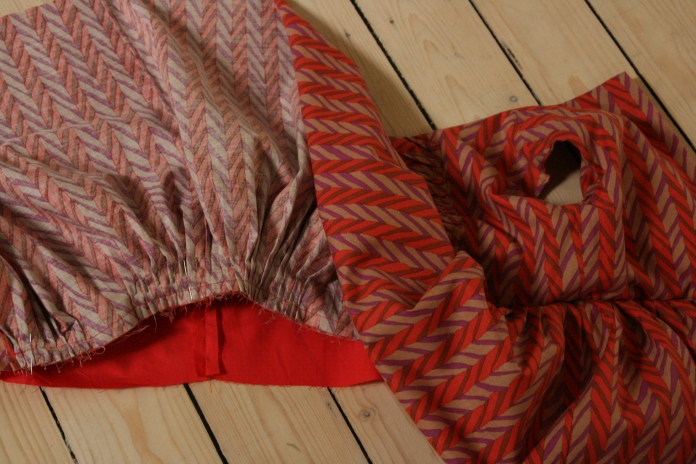
For the skirt a close side seams (not the center back) and gather the pieces for the skirt to match the width of the bodice.  For this particular fabric I’m using pleats again instead of a gathering.  I attach the skirt onto the bodice outer shell. Then I fix the inner shell by stitching from the outside on the seam between skirt and bodice. (to hide inner seam)  I’m closing the lower part of the skirt at center back and finish the hem.  Finally I’m adding buttons and buttonholes at center back.

girls dress

sketch 50's dress

Standard

Pleats please!

IMG_2766c

IMG_2797b

There it is, my new poplin dress!  I started from the rectangle top from my last post and simply added a skirt part.  The wide skirt is made out of two rectangles which I pleated in an irregular way.  Nothing complicated or difficult about it.  Just pleat the way you like it and stitch the skirt unto the top.  I didn’t iron the pleats so they stay playful and easy going.  The best part about this dress is that it needs no zipper and all seams are surged.

DeocrativeScissors-0610

Hier is het, mijn nieuw popeline jurkje.  Ik startte vanuit de rechthoekige top van mijn vorige post en voegde er eenvoudig een rok aan toe.  De wijde rok bestaat uit twee rechthoeken die ik op een onregelmatige manier plooide.  Niets ingewikkeld of moeilijk aan.  Gewoon een beetje plooien zoals je het zelf mooi vind en vastzetten aan de top.  Ik heb de plooien niet plat gestreken zodat ze speels een eenvoudig blijven.  Het beste aan dit jurkje is dat ik er geen ritssluiting in moet zetten en alle zomen gewoon met een overlocksteek werden afgewerkt.

sewing machine

rectangle topskirt

IMG_2702 IMG_2715

1) 1 x front + 1 x back + 2 x skirt part : close side seams and shoulder seam

1 x voorkant + 1 x rugkant + 2 x rokpand : stik de zijnaden en schoudernaden

IMG_2733 IMG_2738 IMG_2748

2) Pleat skirt just so that it fits the top.  The chalk line shows me where to pin the skirt.  Sticht the skirt on to the top.

Maak plooien bovenaan het rokdeel totdat het past op de top.  Het krijtlijntje toont me waar ik de rok moet vastspelden.  Stik de rok vast aan de top.

IMG_2753

3) Finished!

En klaar!

Standard

Easy Peplum Dress

IMG_2445bIMG_2468bIMG_2487BIMG_2494bIMG_2418b

Eindelijk zomer en tijd voor frisse zomerjurkjes!  Ik bevries wanneer we deze foto’s maken maar het kan me niet deren, ik ben al die regen en koude stilaan kotsbeu.  Het jurkje is rechttoe rechtaan met een elastiek bovenaan om alles op zijn plaats te houden.  Ik koos voor een exotische print in navy op witte katoen voile en dat maakt het eenvoudig combineren met gekleurde blazertjes of sjaals.  Omdat het stofje licht doorschijnend is heb ik een witte anti-statische voering gebruikt en dat zorgt meteen voor een gemakkelijke en mooie afwerking.  Om het geheel echt af te maken heb ik een peplum-ceintuur gemaakt maar eender welke ceintuur is goed als je niet van peplum houd.  Ik hoop dat je ervan geniet om dit jurkje te maken.  Eenvoudig en chic, dat is toch de bedoeling, niet?

DeocrativeScissors-0610

Finally summer and there it is, my first dress!  I’m freezing as we are taking these pictures but I don’t care,  I’m just sick of all the rain and coldness.   It’s an easy straight dress with elastic trimming to keep everything at place.  The pattern exists of an exotic printed cotton in navy and white which makes it easy to combine with a bright colored blazer or scarf.  The fabric is somewhat transparent so I used a white anti-static lining, it’s actually easier to finish that way.  As a final touch I made a peplum belt in the same fabric but you can use any leather belt if you don’t like peplum.  I hope you enjoy making this.   Easy and chic, that’s what it’s all about, isn’t it?

sewing machine

peplum dress


1)  Stitch the side seams from fabric and lining –  De zijnaden van bovenstof en voering worden dicht gestikt.

IMG_2339 IMG_2342 IMG_2343

2) The fabric and lining are sewn together on the top. Reverse the fabric with the lining on the inside – De stof en de voering worden bovenaan dicht gestikt.  Keer de stof om met de voering aan de binnenzijde.

IMG_2346  dress center back  

3) Stitch a tunnel at 4,5cm for the elastic band (elastic band width: 4cm ). Leave the tunnel open for 10cm at the center back to pull trough the elastic band. – stik een tunnel op 4,5cm van de rand voor de elastiek (elastiek breedte: 4cm)  Laat de tunnel 10cm open op de achterzijde om de elastiek door te rijgen.

IMG_2360 IMG_2364 IMG_2377

4) Measure the length for the elastic band (above chest) and cut 4cm smaller. Pull the elastic waistband trough the tunnel with a safety pin.  Fix both ends of the alastic and close seam. – Meet de lengte voor de elastiek boven de borst en snij 4cm smaller. Trek de elastiek door de tunnel met een veiligheidsspeld.  Fixeer beide einden van de elastiek aan elkaar.

IMG_2369IMG_2370IMG_2373

5) For my style I think the dress is to loose at the hem so I reduce width by 8cm on each side (= 32cm) – Voor mij mag de jurk best smaller onderaan dus ik versmal de zoom aan de zijde met 8cm(32cm in totaal)

6) Finish hemlines at 1cm+4cm.  The lining hemline: 1cm+ 1cm – Werk de zoom af op 4cm + 1cm.  De voering zoom: 1cm + 1cm

IMG_2381  IMG_2390

7) The peplum belt: fabric heigth: 50cm x fabric width, folded in 2 to create a tunnel for the elastic band.  Make a small hemline on both sides at 1cm + 1cm.  Use the same instructions as for the dress for the elastic. Sew on a hook and eye by hand – Peplum ceintuur: stofhoogte 50cm x stofbreedte, dubbelvouwen zodat er ook een tunnel ontstaat.  Zomen afwerken met een rolzoom 1cm + 1cm (of smaller).  Gebruikt dezelfde handleiding als bij het jurkje voor de elastiek.  Naai een haak en oog aan de binnenzijde om de ceintuur te sluiten.

IMG_2513

IMG_2417C

Standard