A summer dress pattern…

little girls easy printed dress

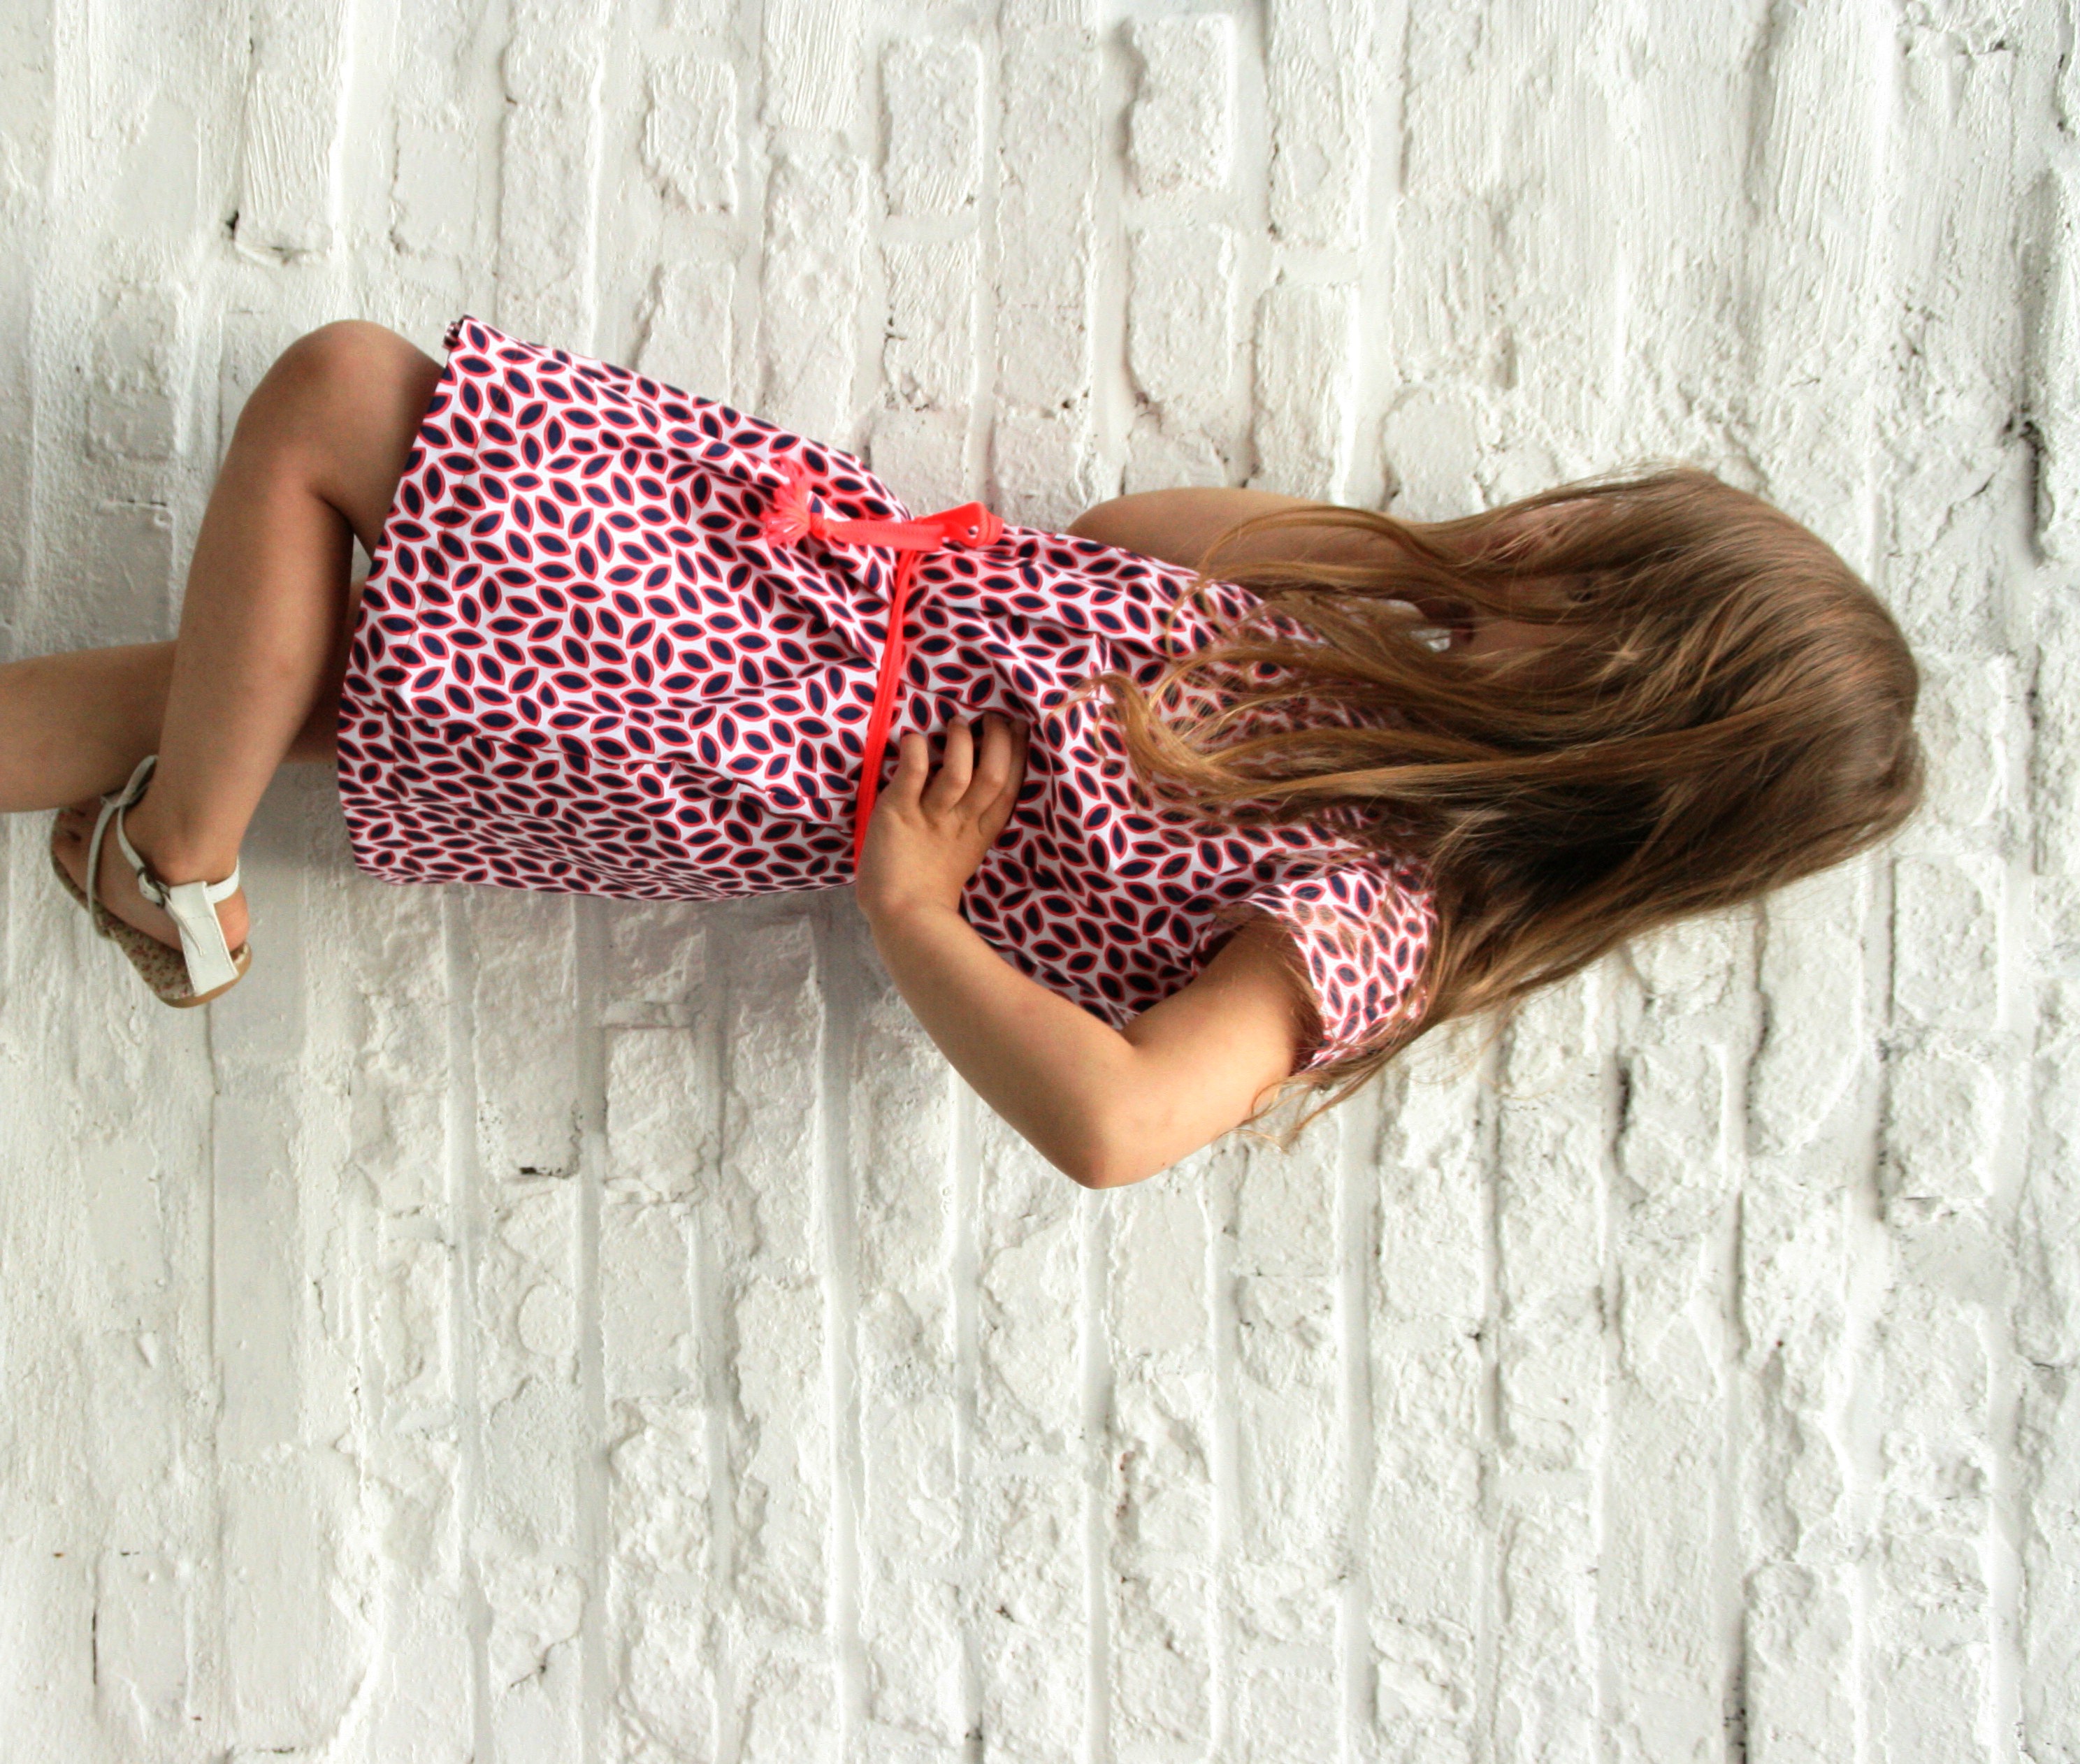
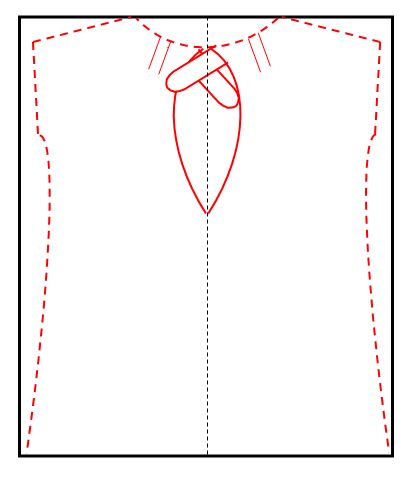
It’s a nice day today, a little cloudy though but enough sun to make some pics of my miniature model.  As always she likes to model her new dresses to any public and I’m smiling as I see her twisting and turning her hips before my camera.  It’s a simple dress in a cute pattern with a contrast binding and some pleating at the neckline.  At the back I made a V-shaped slit and I closed it with a little bow.  It was easy, didn’t took very long and absolutely worth the attempt!

little girls printed dress

IMG_7046

Dresses for girls


IMG_7067

IMG_7068

IMG_7076

sewing machine

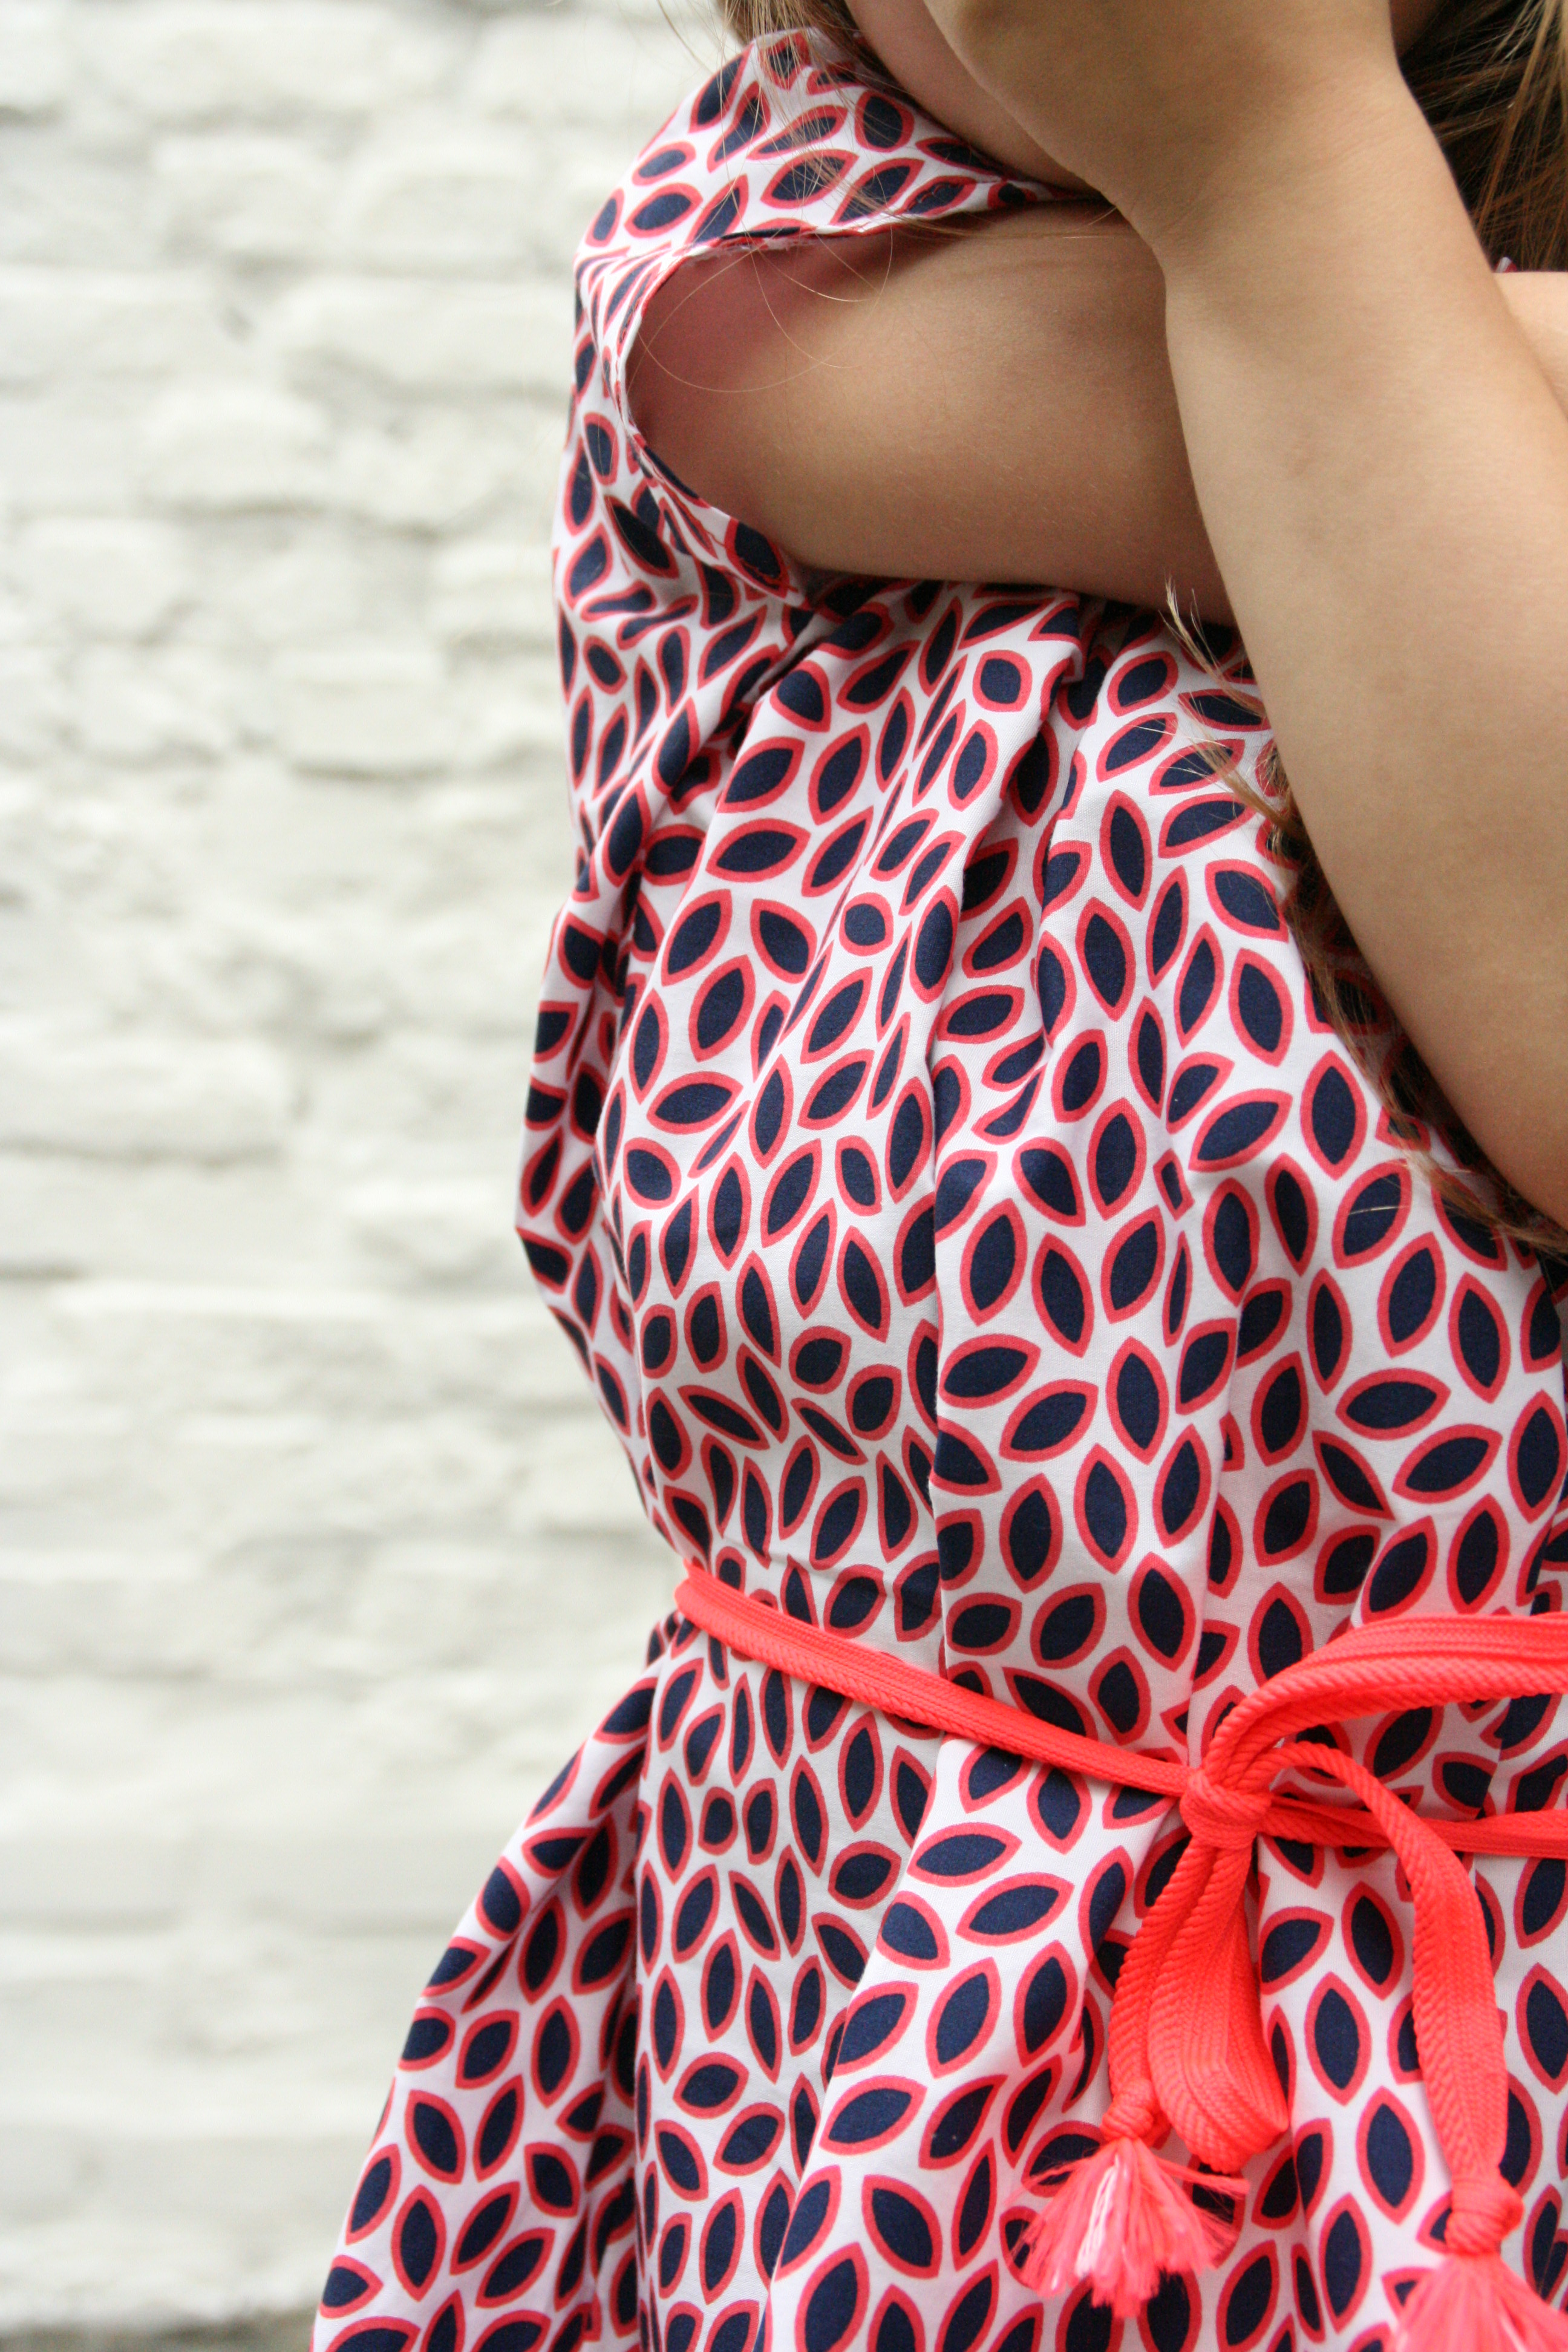
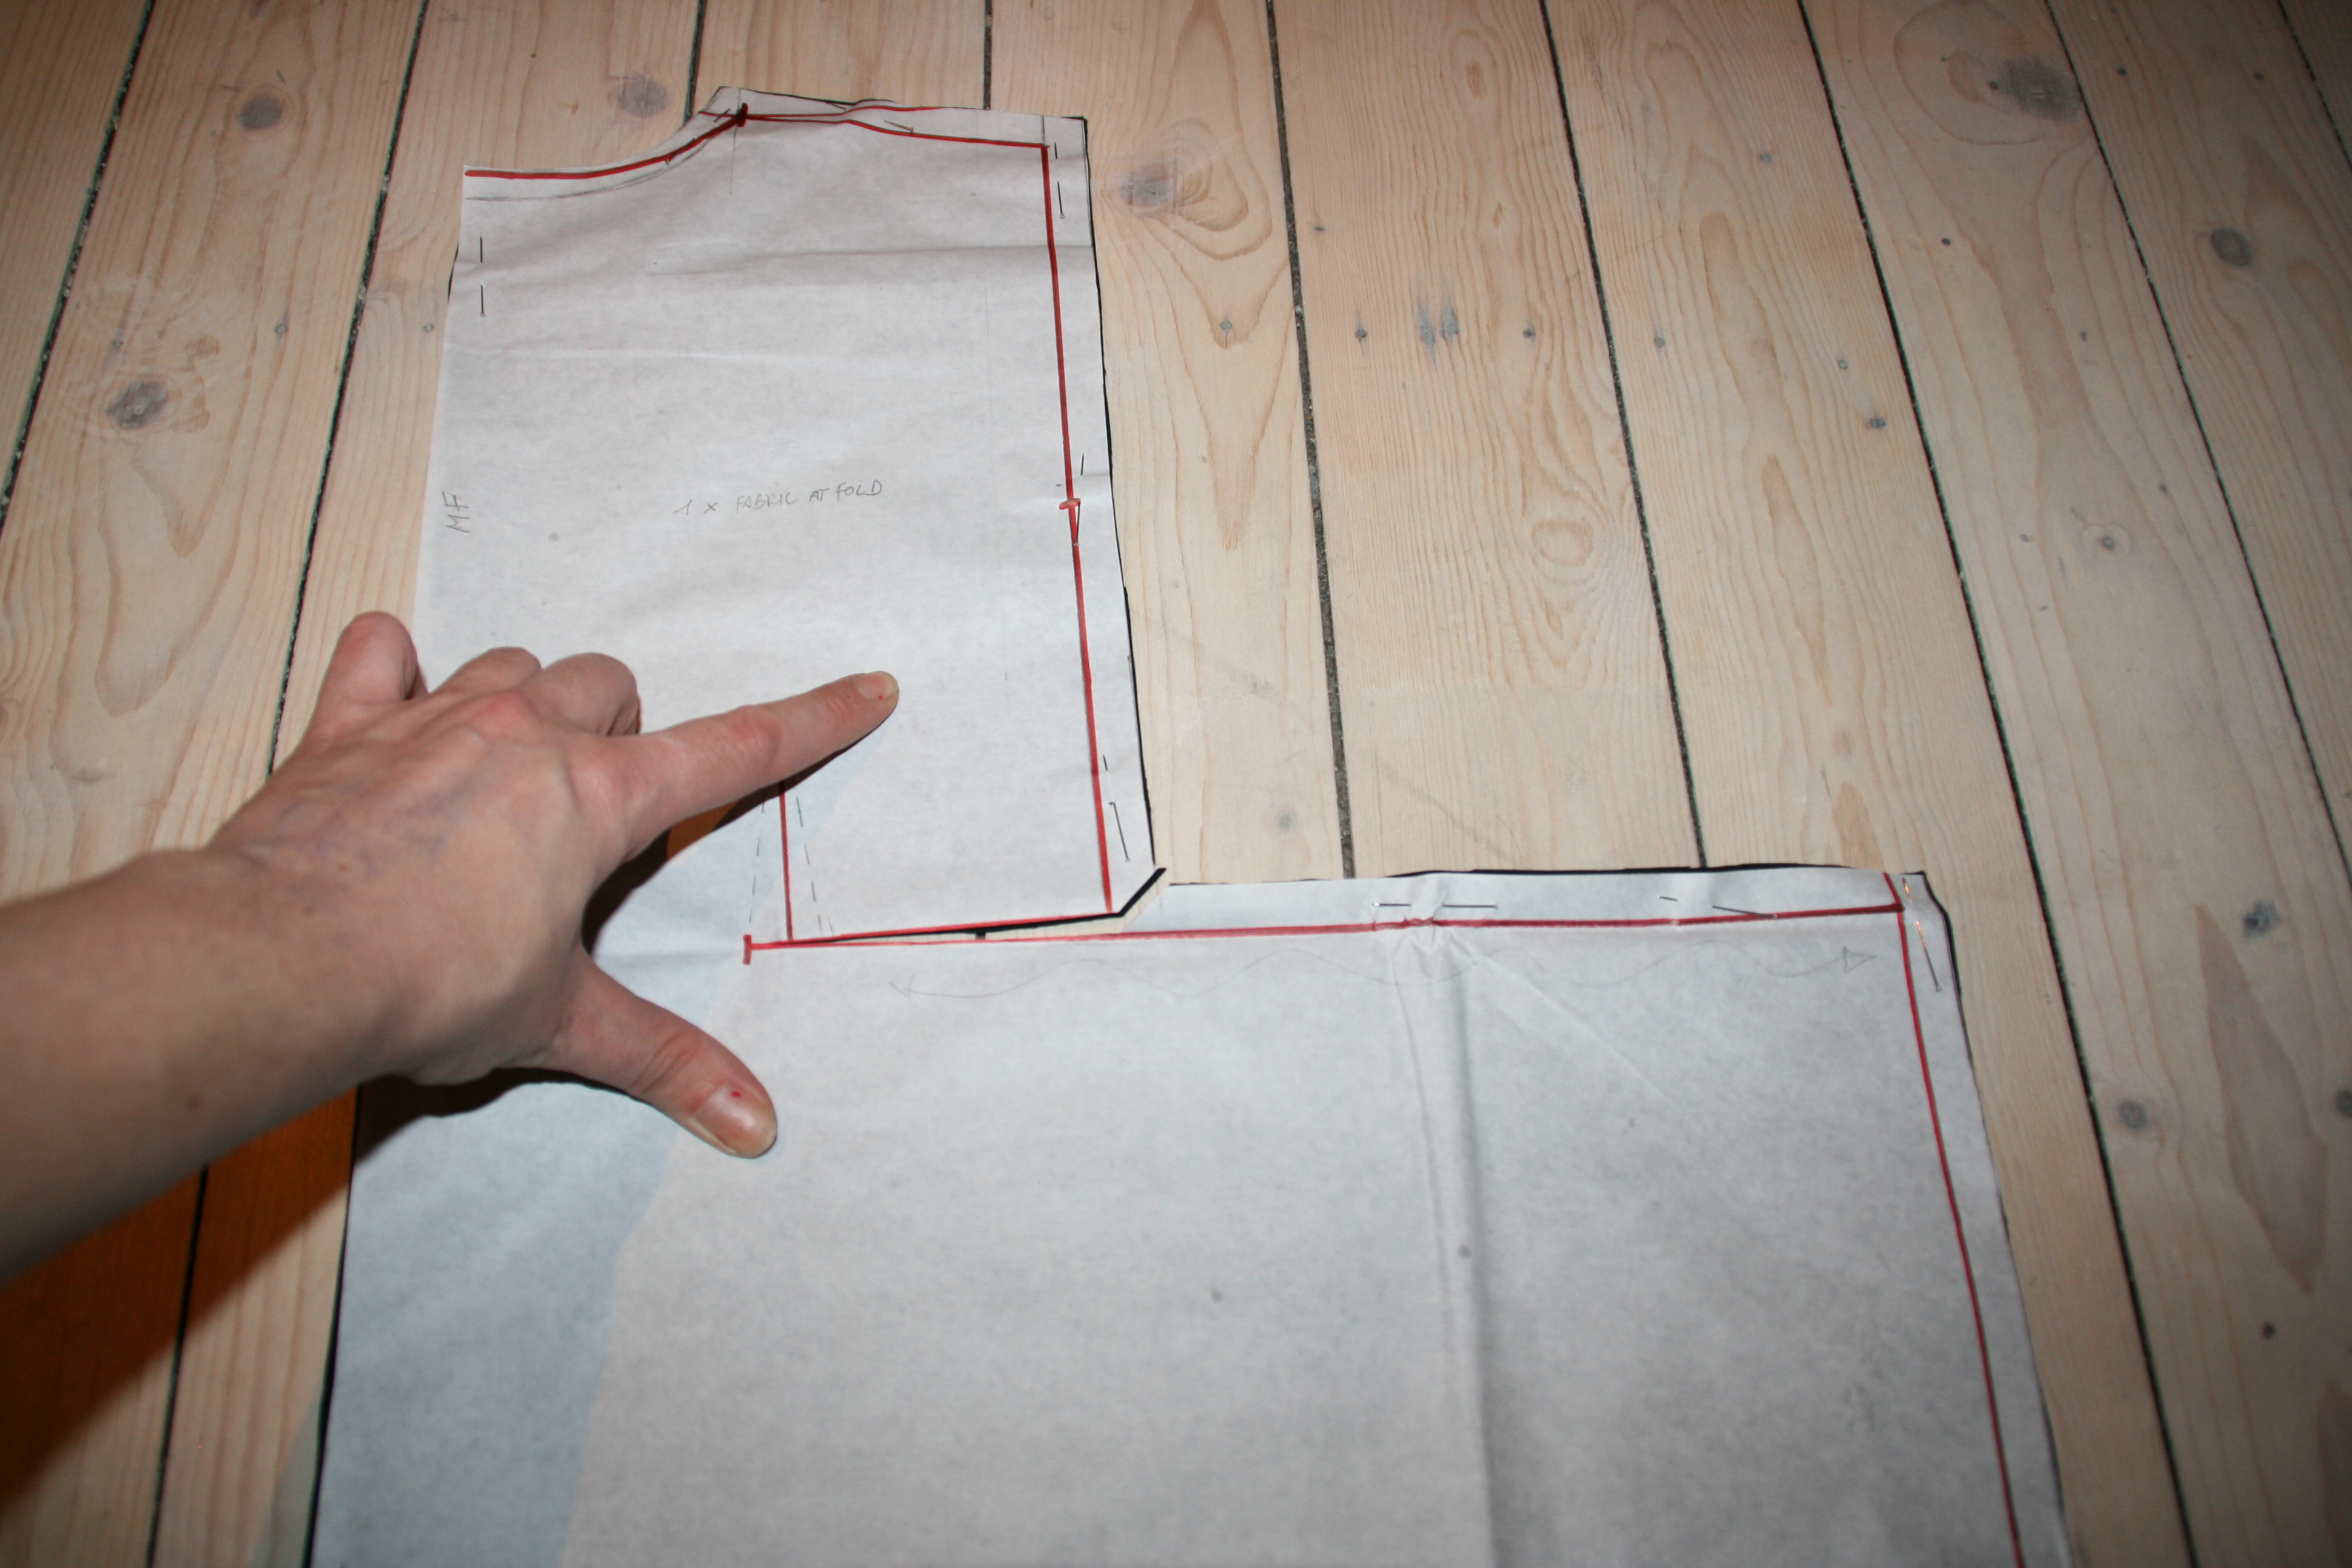
The sizes mentioned below are for a 4 Year old.  The total length is 56cm, so I started with a rectangle of 56cm (height) and 24cm (1/2 width) After drafting the pattern I added the pleats.  I marked the darts at the neckline and cut into the pattern all the way down to the hem.  I added 1.5cm width for each pleat (only on top, 0cm at hem) , this will increase the neck width but after sewing the pleats it will have the original width again.   As a finishing touch I made a belt of the contrast binding I used for the back.  I hope you have fun when you’re making this!

xxx Made By Me!

tekening voorkant     tekening rugzijde


Standard

The little little black dress

tutorial LBD little girl  black buttons

Here it is, (finally, after caught up with work) : ‘the LLBD’.  It started with some leftover black buttons, some yards of black popeline and the urge to combine this somehow.  I know, using black for a little girl is somewhat unusual but this dress looks so adorable on her.  It’s amazing how this easy pattern resulted in such a well fitted dress, and in my mind it’s the LBD ‘Audrey’ would have liked as well.

sewing machine
IMG_5676      IMG_5677  pattern lbd

The few measurements I took were her tummy, neckline and the length.  I started from a rectangle based on the dress length and the skirt width.  Half way the rectangle I marked the waist and from that point I drew the bodice shaping a smaller rectangle.  Then adding darts, a neckline and armholes.  Easy, no?

IMG_5686

For the back I copied the front pattern, adding 1cm of seam allowance at the centre back.   I made a facing for the neckline and armholes.

IMG_5692

When cutting the pattern I cut into the front part until the dart.

IMG_5697

The  waist is gathered to fit the bodice and sewn together.  Afterwards I sew the darts.

IMG_5708

This looks nice already, doesn’t it?

IMG_5713

I sew the shoulders and facing.  It would have been easier to use a binding to finish the dress but this way I create a more sophisticated look.

IMG_5717

I sew the side seams and hem.  I prefer a hem with enough seam allowance,  5cm for this dress.

IMG_5719

I added loops at the shoulders to narrow the shoulder width. To make this dress more glamorous I sewed on large black buttons around the neck opening.  These buttons never seemed to have found there way back to the original clothes but hey, this is much more fun!

audrey-hepburn-fancy-dress-costume-idea

Love You Audrey, xxx

Standard