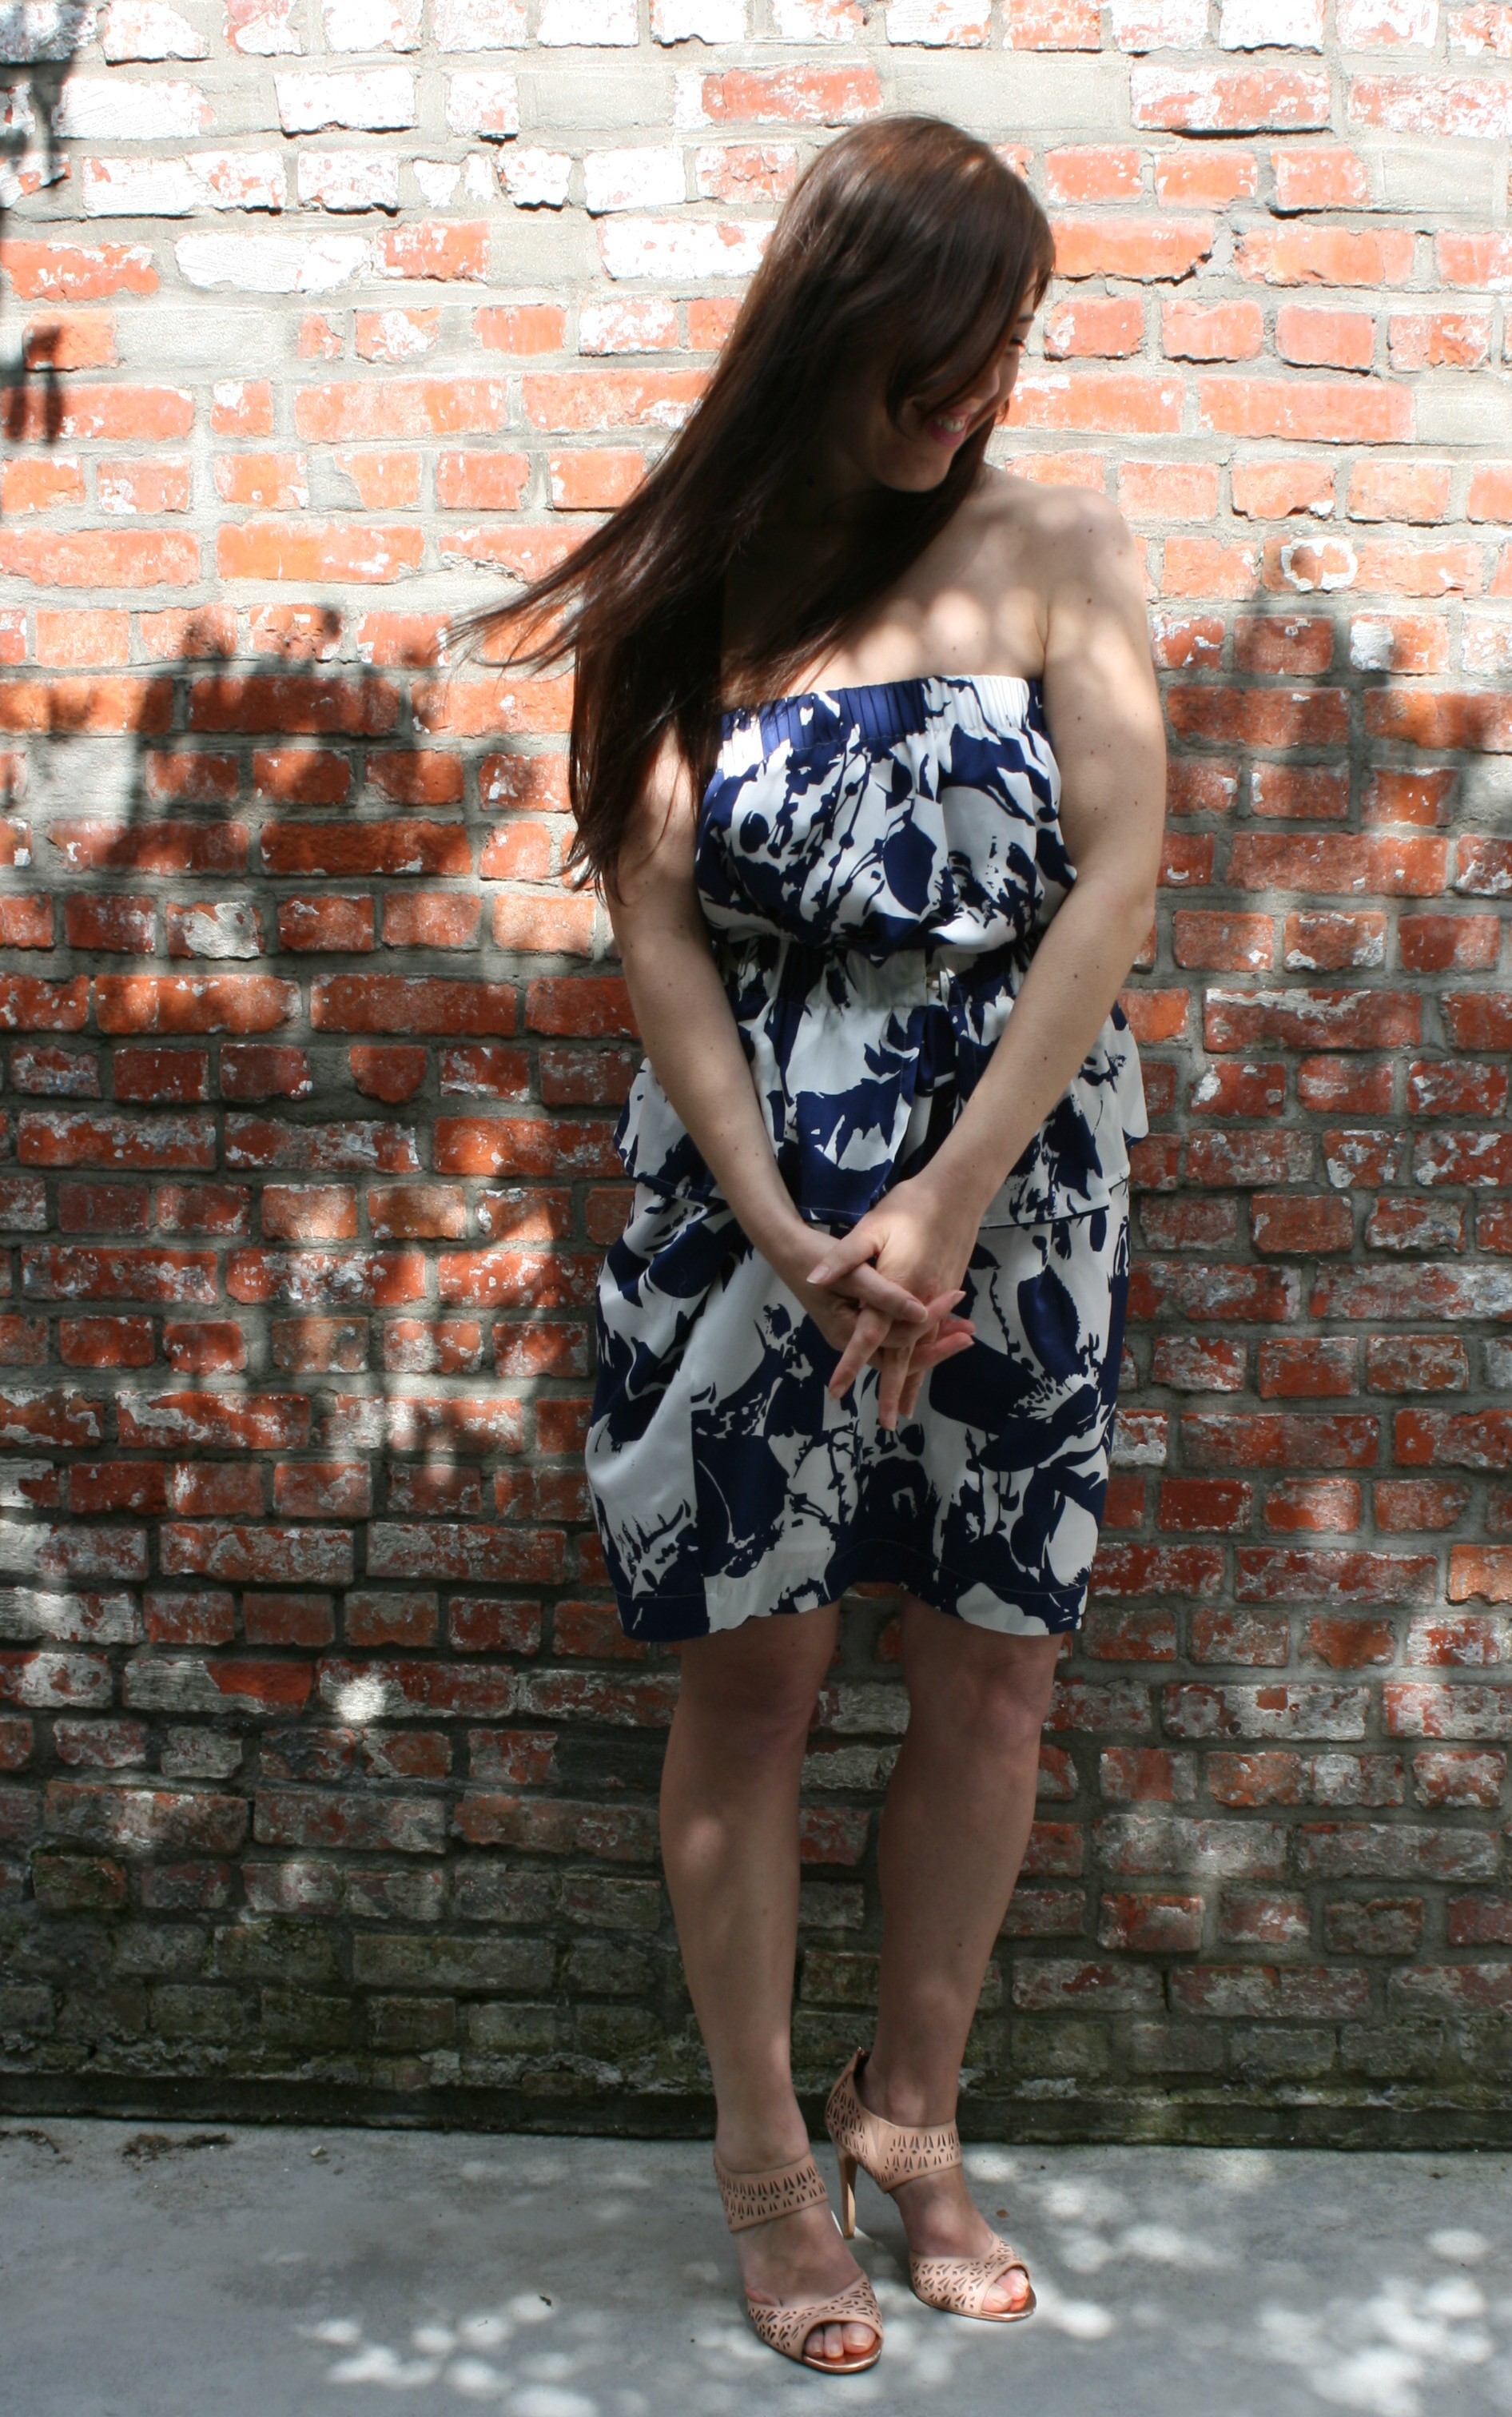
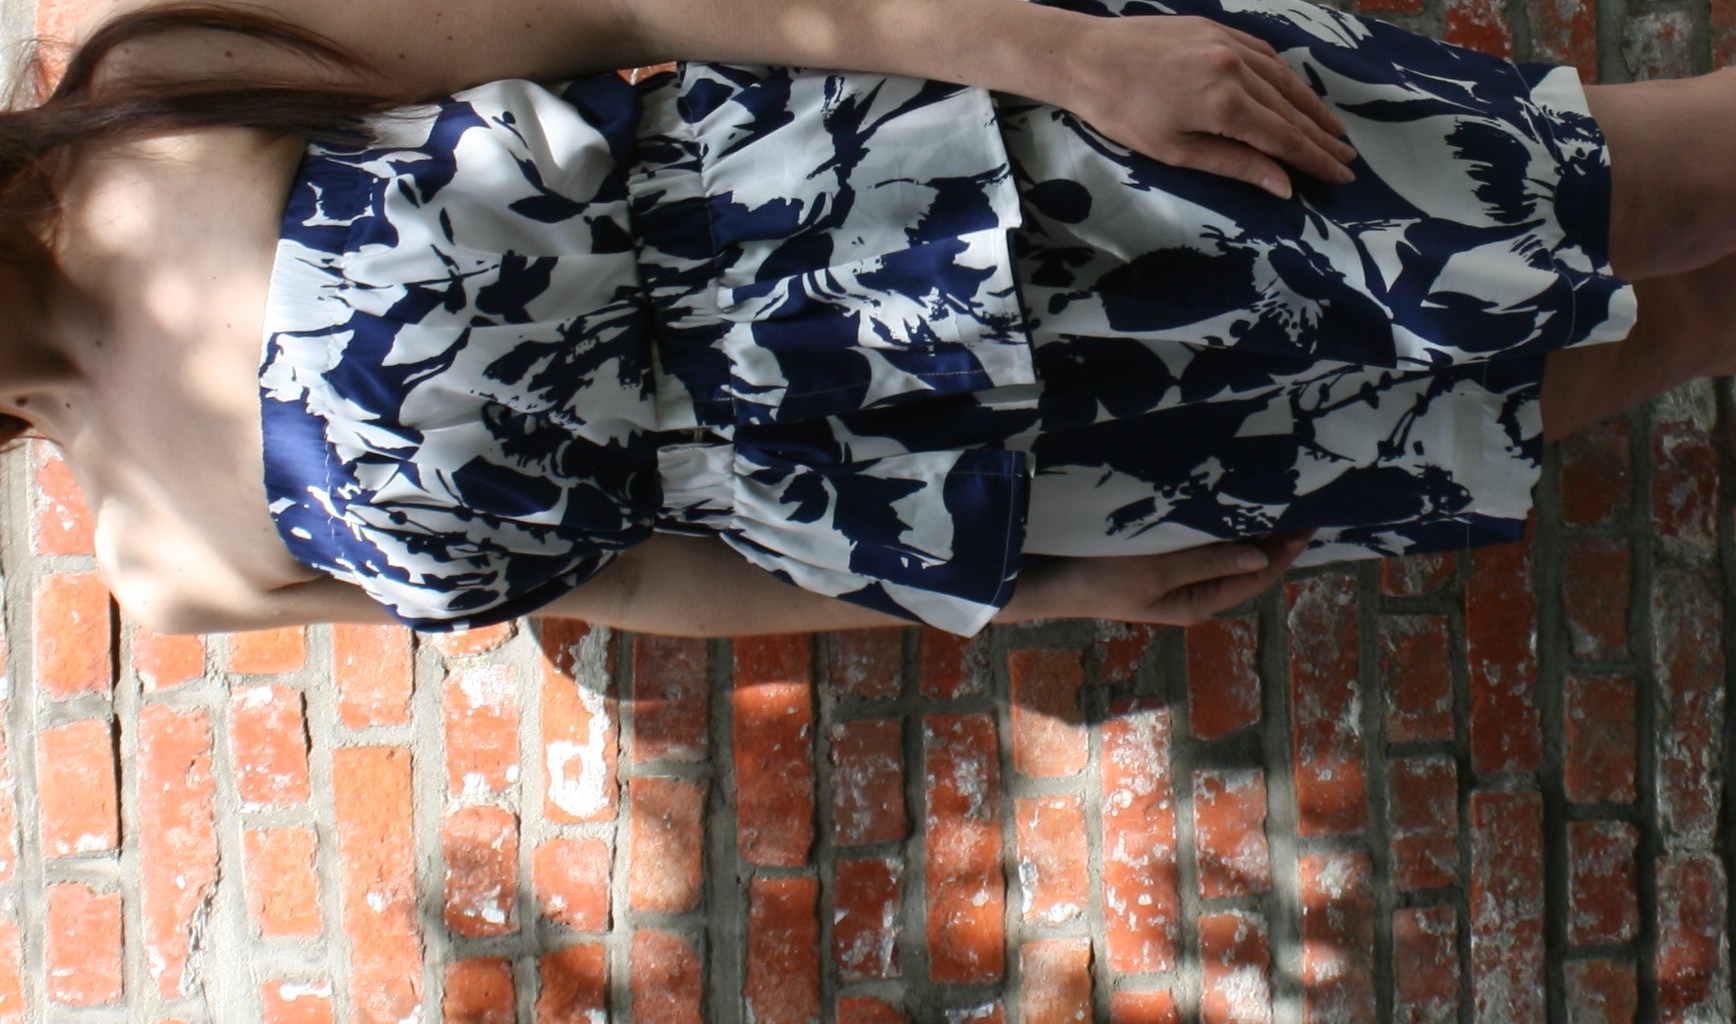
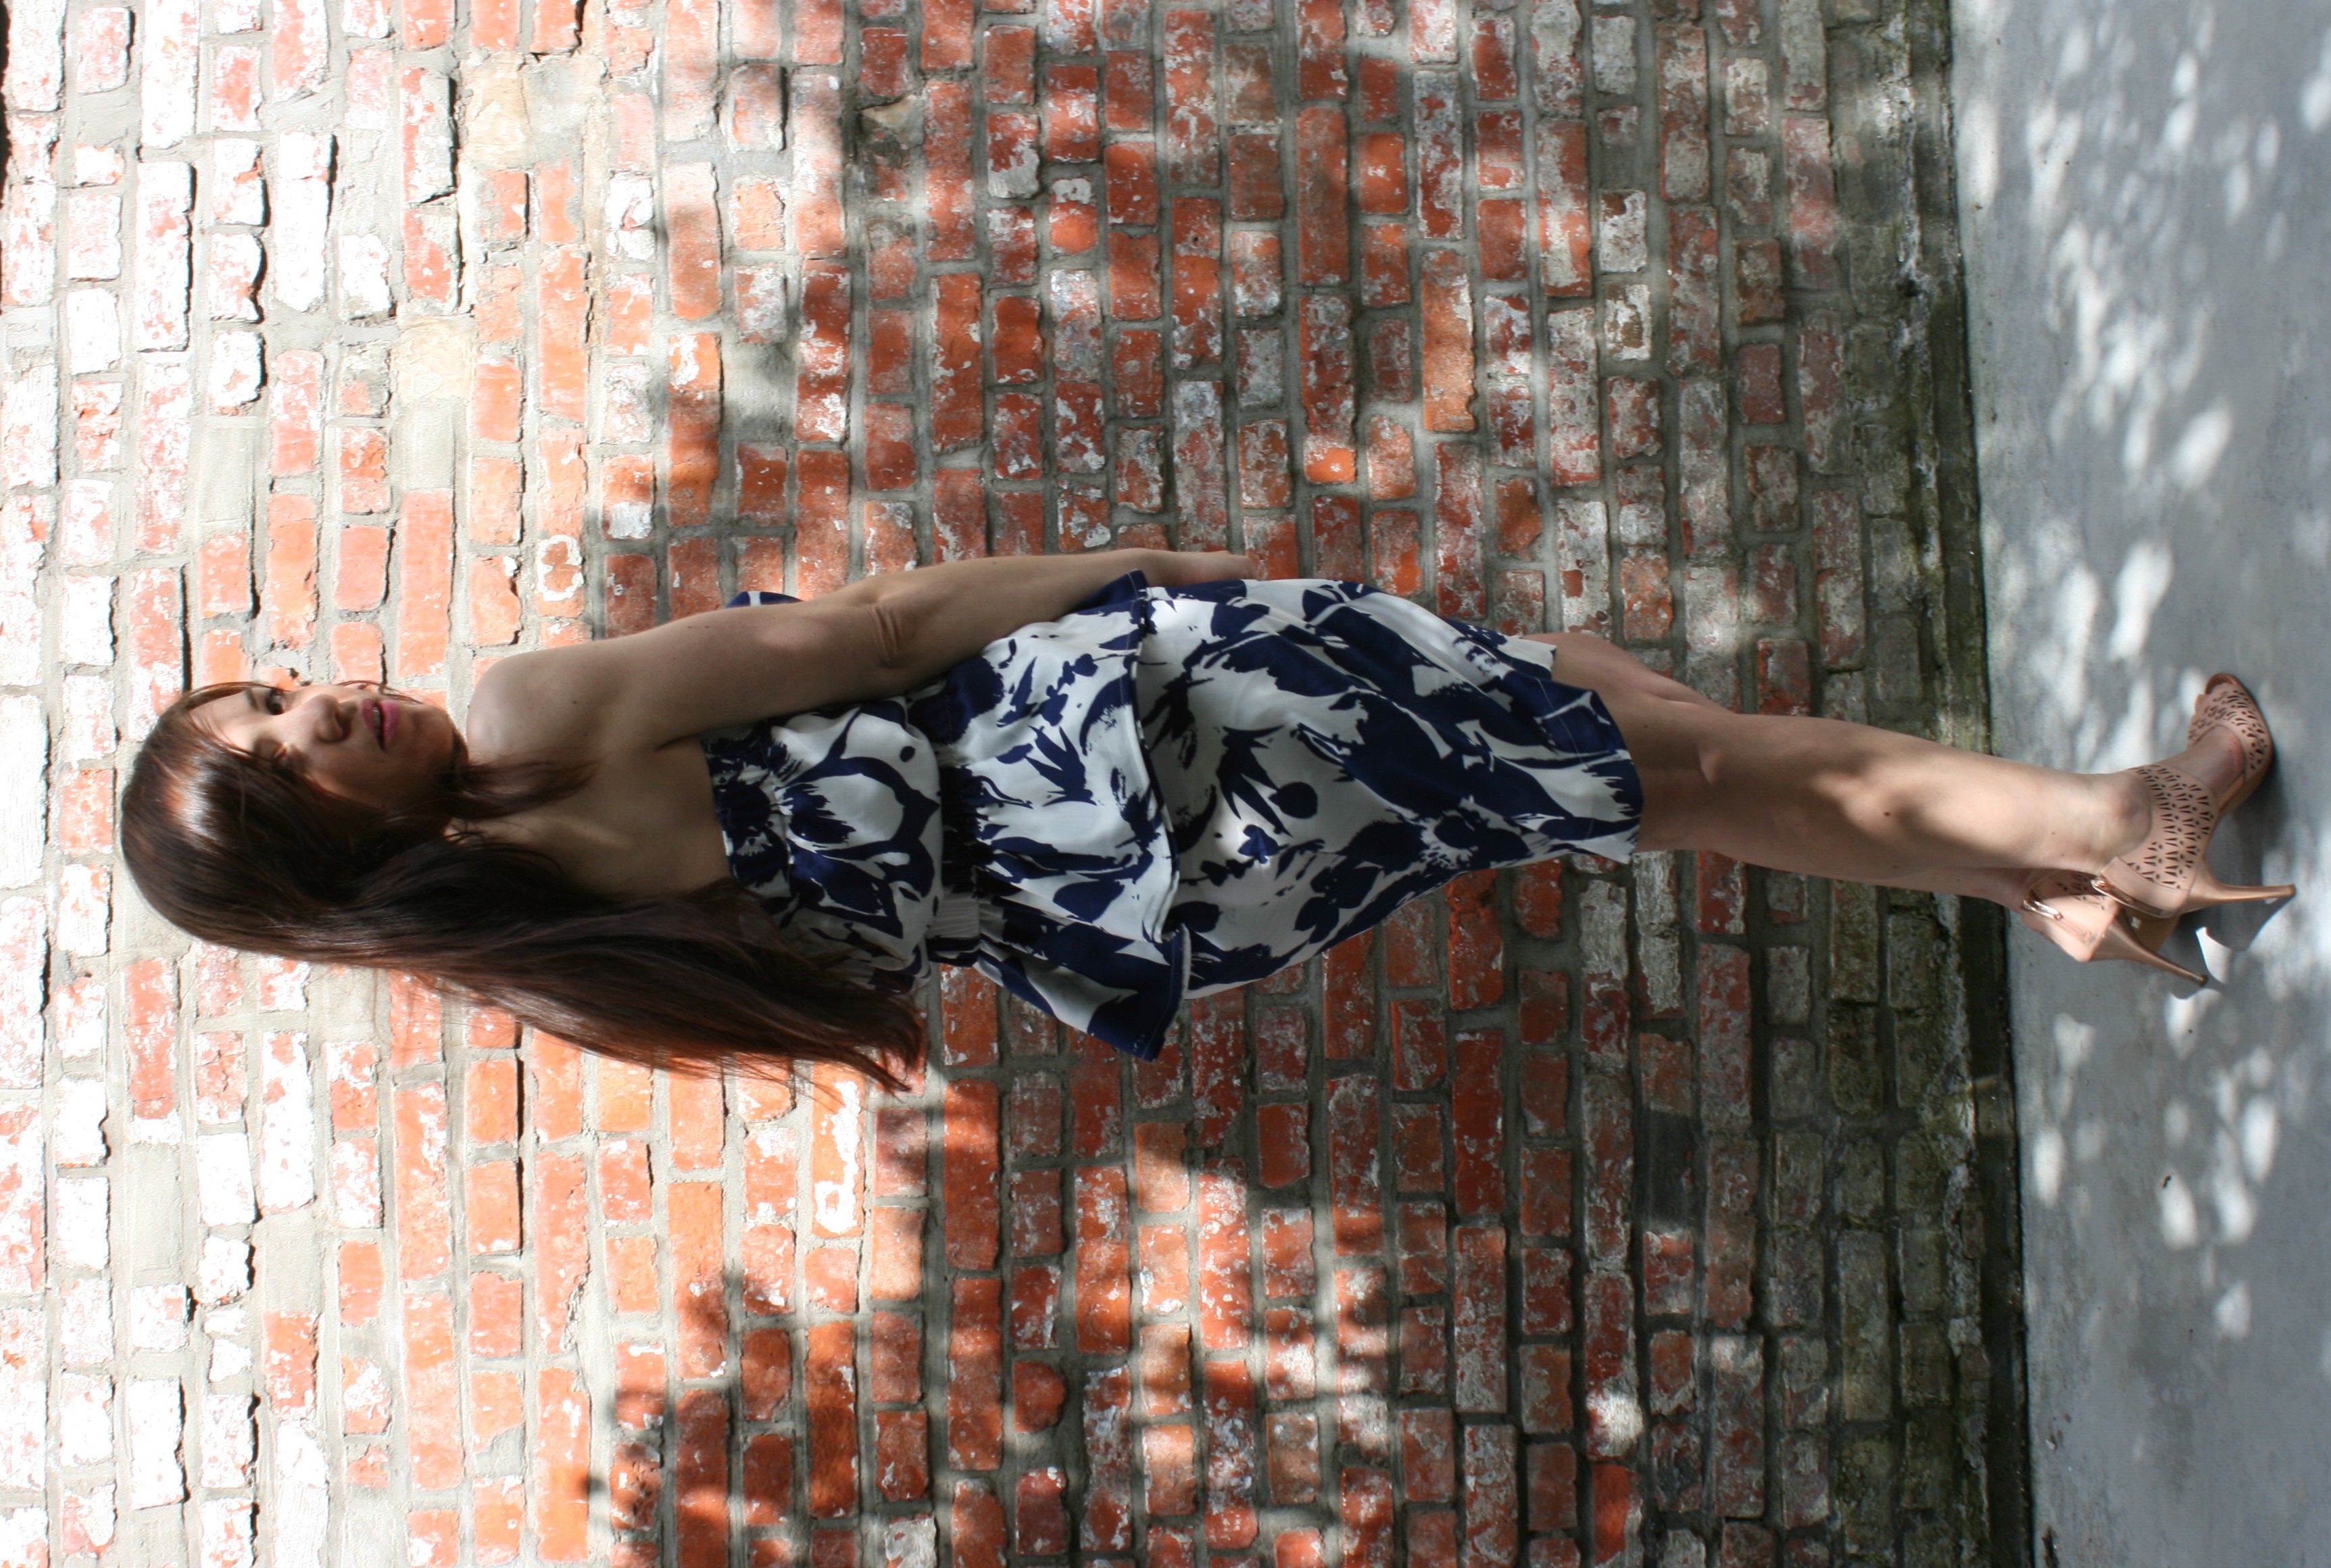
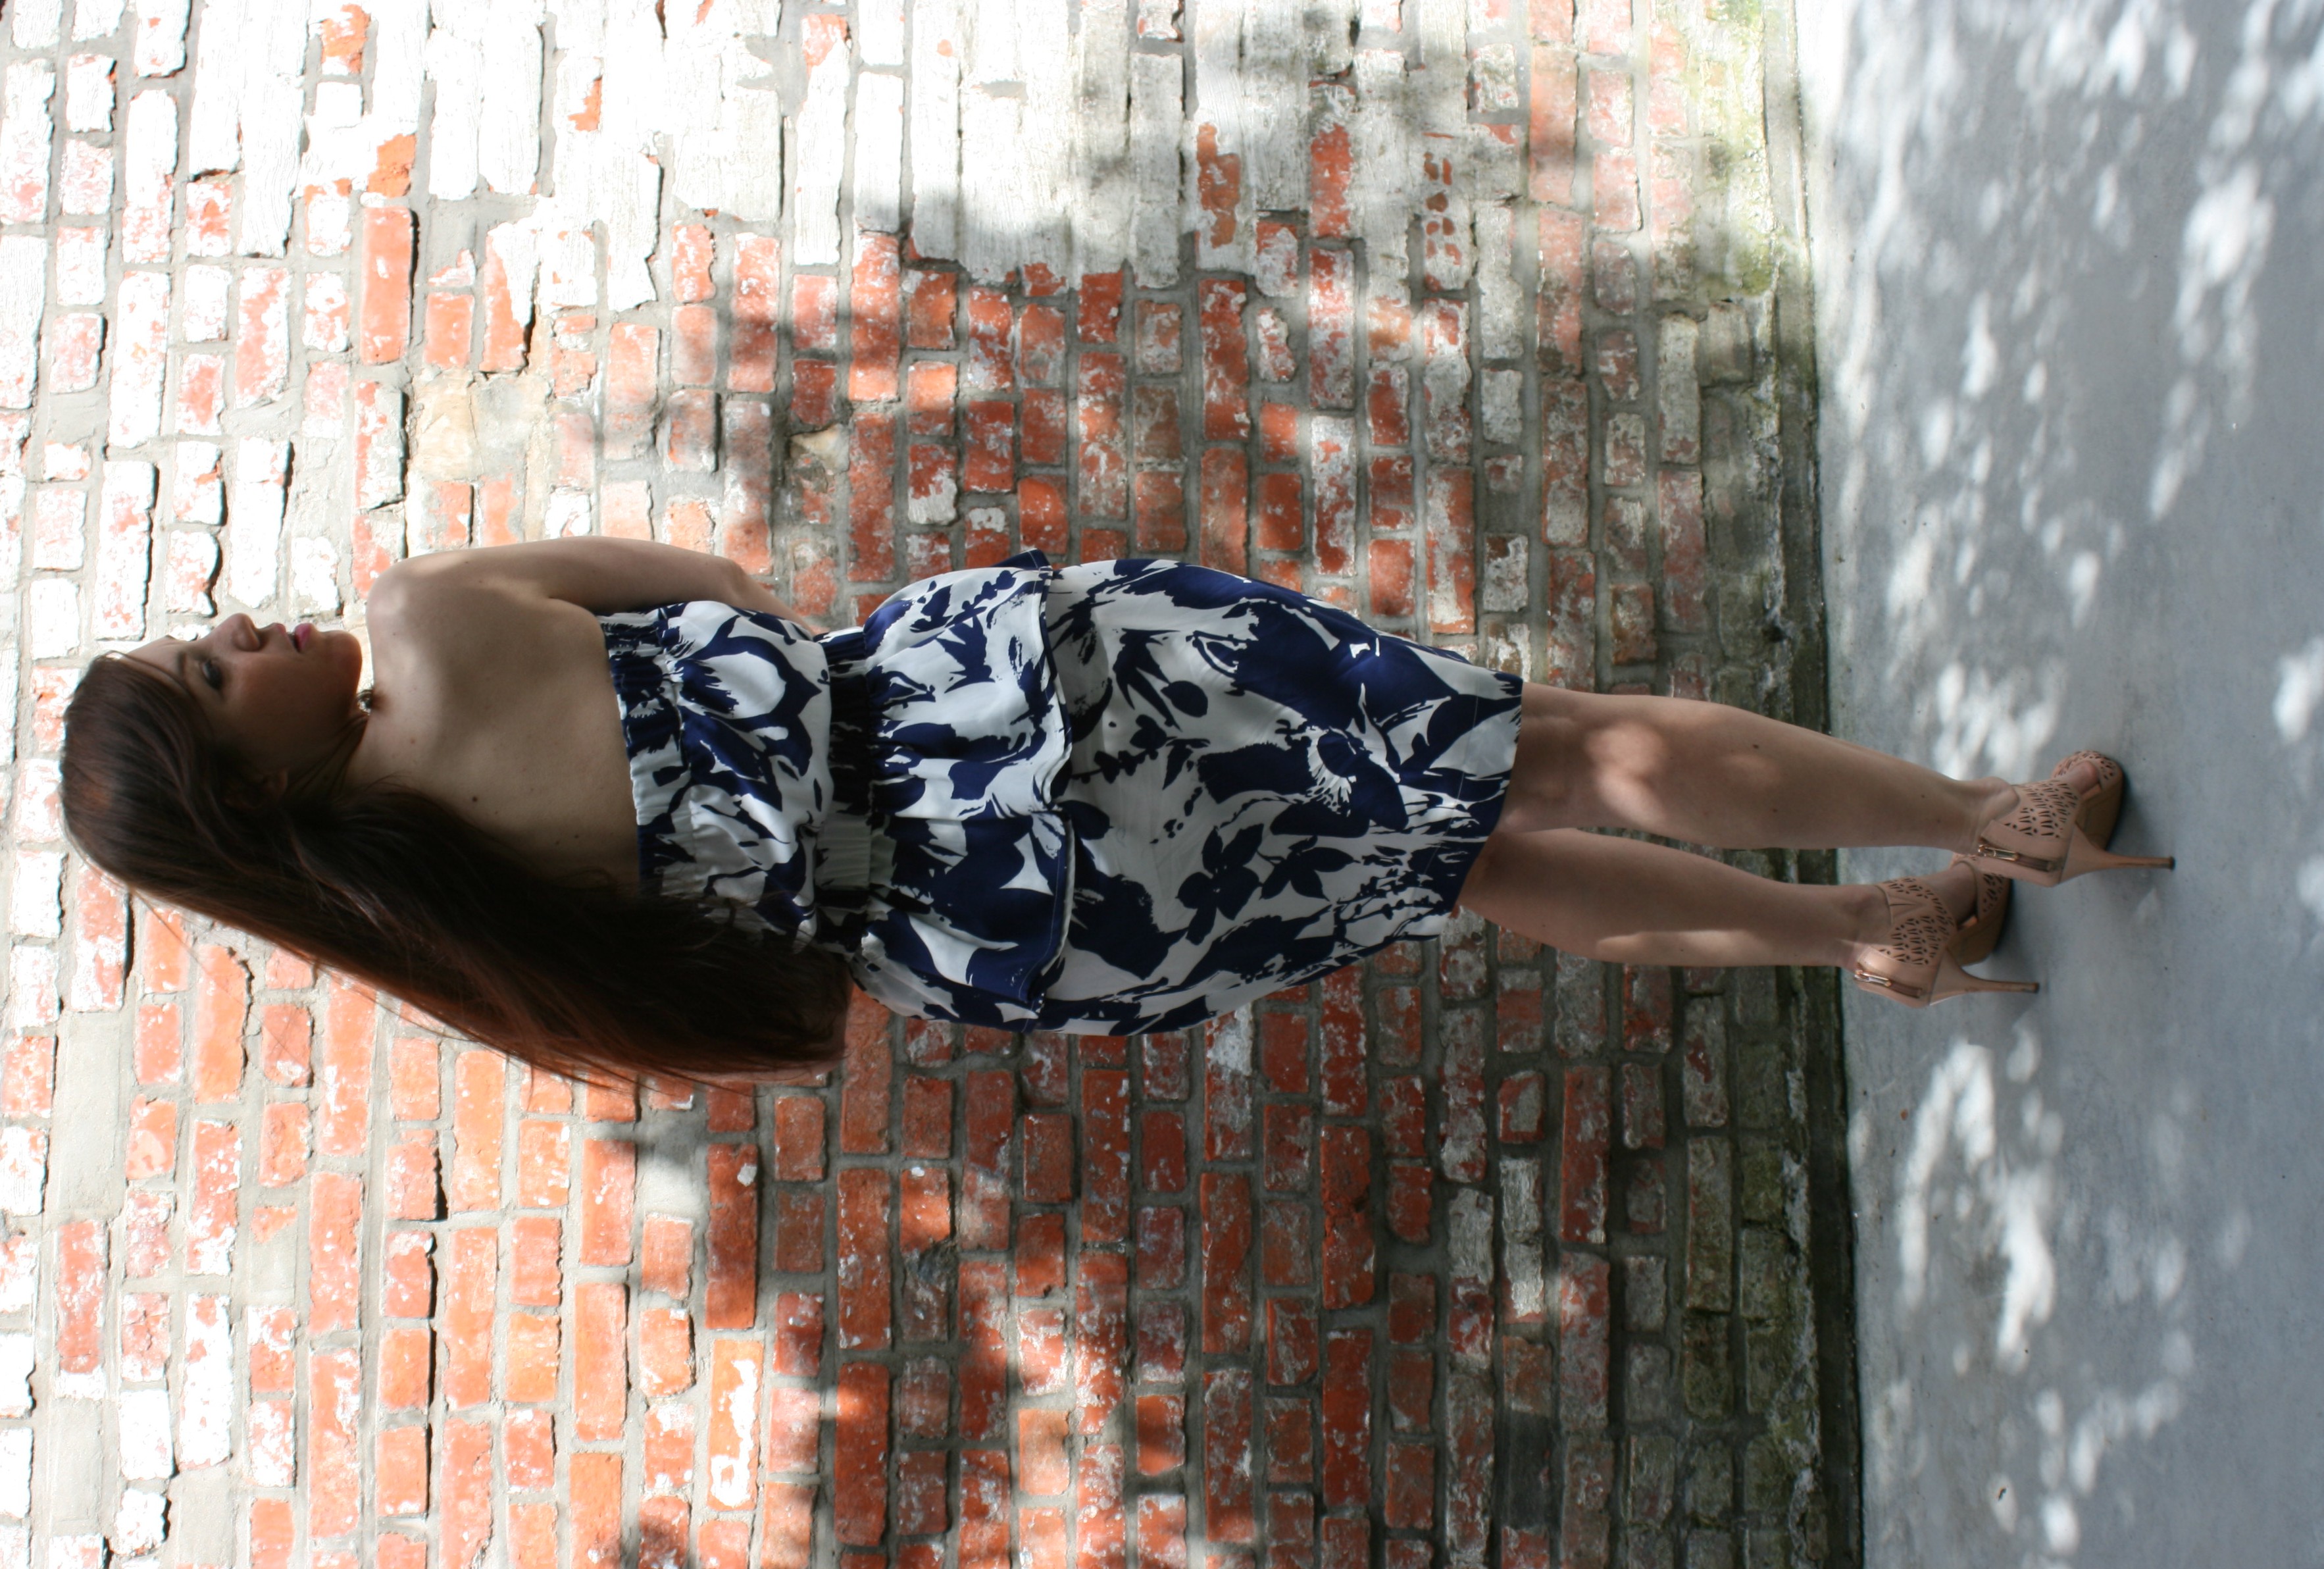

Eindelijk zomer en tijd voor frisse zomerjurkjes! Ik bevries wanneer we deze foto’s maken maar het kan me niet deren, ik ben al die regen en koude stilaan kotsbeu. Het jurkje is rechttoe rechtaan met een elastiek bovenaan om alles op zijn plaats te houden. Ik koos voor een exotische print in navy op witte katoen voile en dat maakt het eenvoudig combineren met gekleurde blazertjes of sjaals. Omdat het stofje licht doorschijnend is heb ik een witte anti-statische voering gebruikt en dat zorgt meteen voor een gemakkelijke en mooie afwerking. Om het geheel echt af te maken heb ik een peplum-ceintuur gemaakt maar eender welke ceintuur is goed als je niet van peplum houd. Ik hoop dat je ervan geniet om dit jurkje te maken. Eenvoudig en chic, dat is toch de bedoeling, niet?

Finally summer and there it is, my first dress! I’m freezing as we are taking these pictures but I don’t care, I’m just sick of all the rain and coldness. It’s an easy straight dress with elastic trimming to keep everything at place. The pattern exists of an exotic printed cotton in navy and white which makes it easy to combine with a bright colored blazer or scarf. The fabric is somewhat transparent so I used a white anti-static lining, it’s actually easier to finish that way. As a final touch I made a peplum belt in the same fabric but you can use any leather belt if you don’t like peplum. I hope you enjoy making this. Easy and chic, that’s what it’s all about, isn’t it?


1) Stitch the side seams from fabric and lining – De zijnaden van bovenstof en voering worden dicht gestikt.
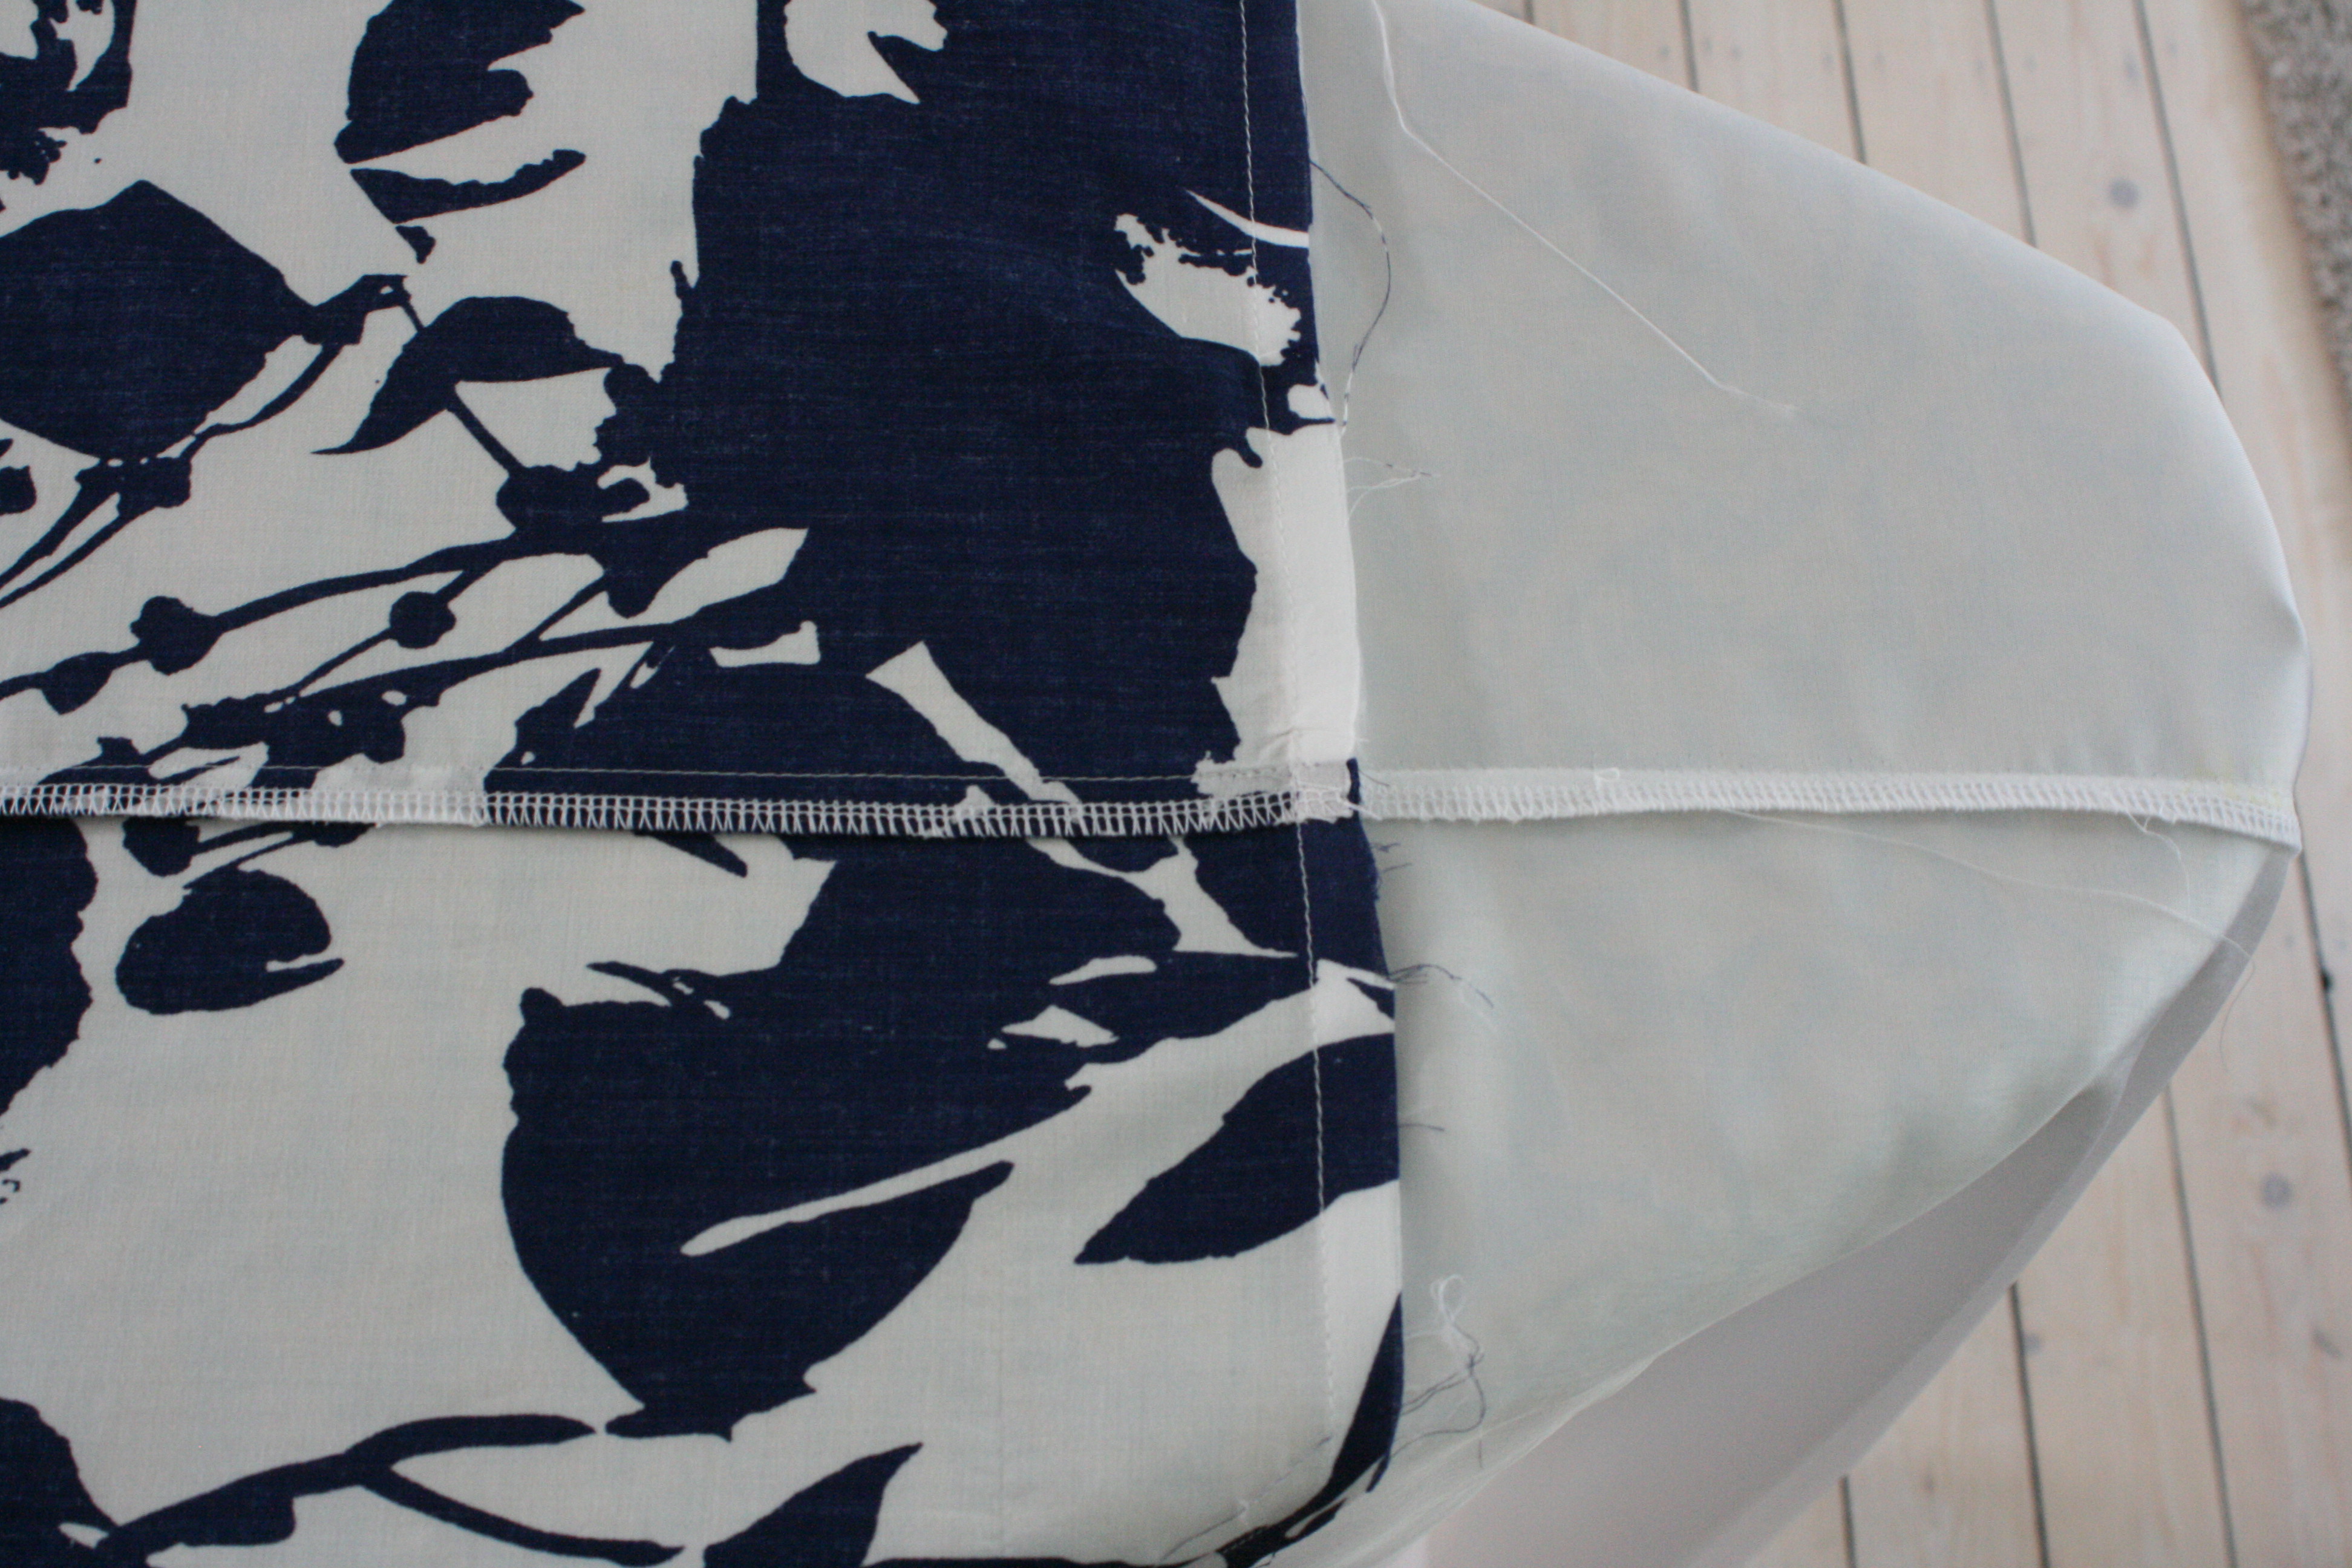

2) The fabric and lining are sewn together on the top. Reverse the fabric with the lining on the inside – De stof en de voering worden bovenaan dicht gestikt. Keer de stof om met de voering aan de binnenzijde.
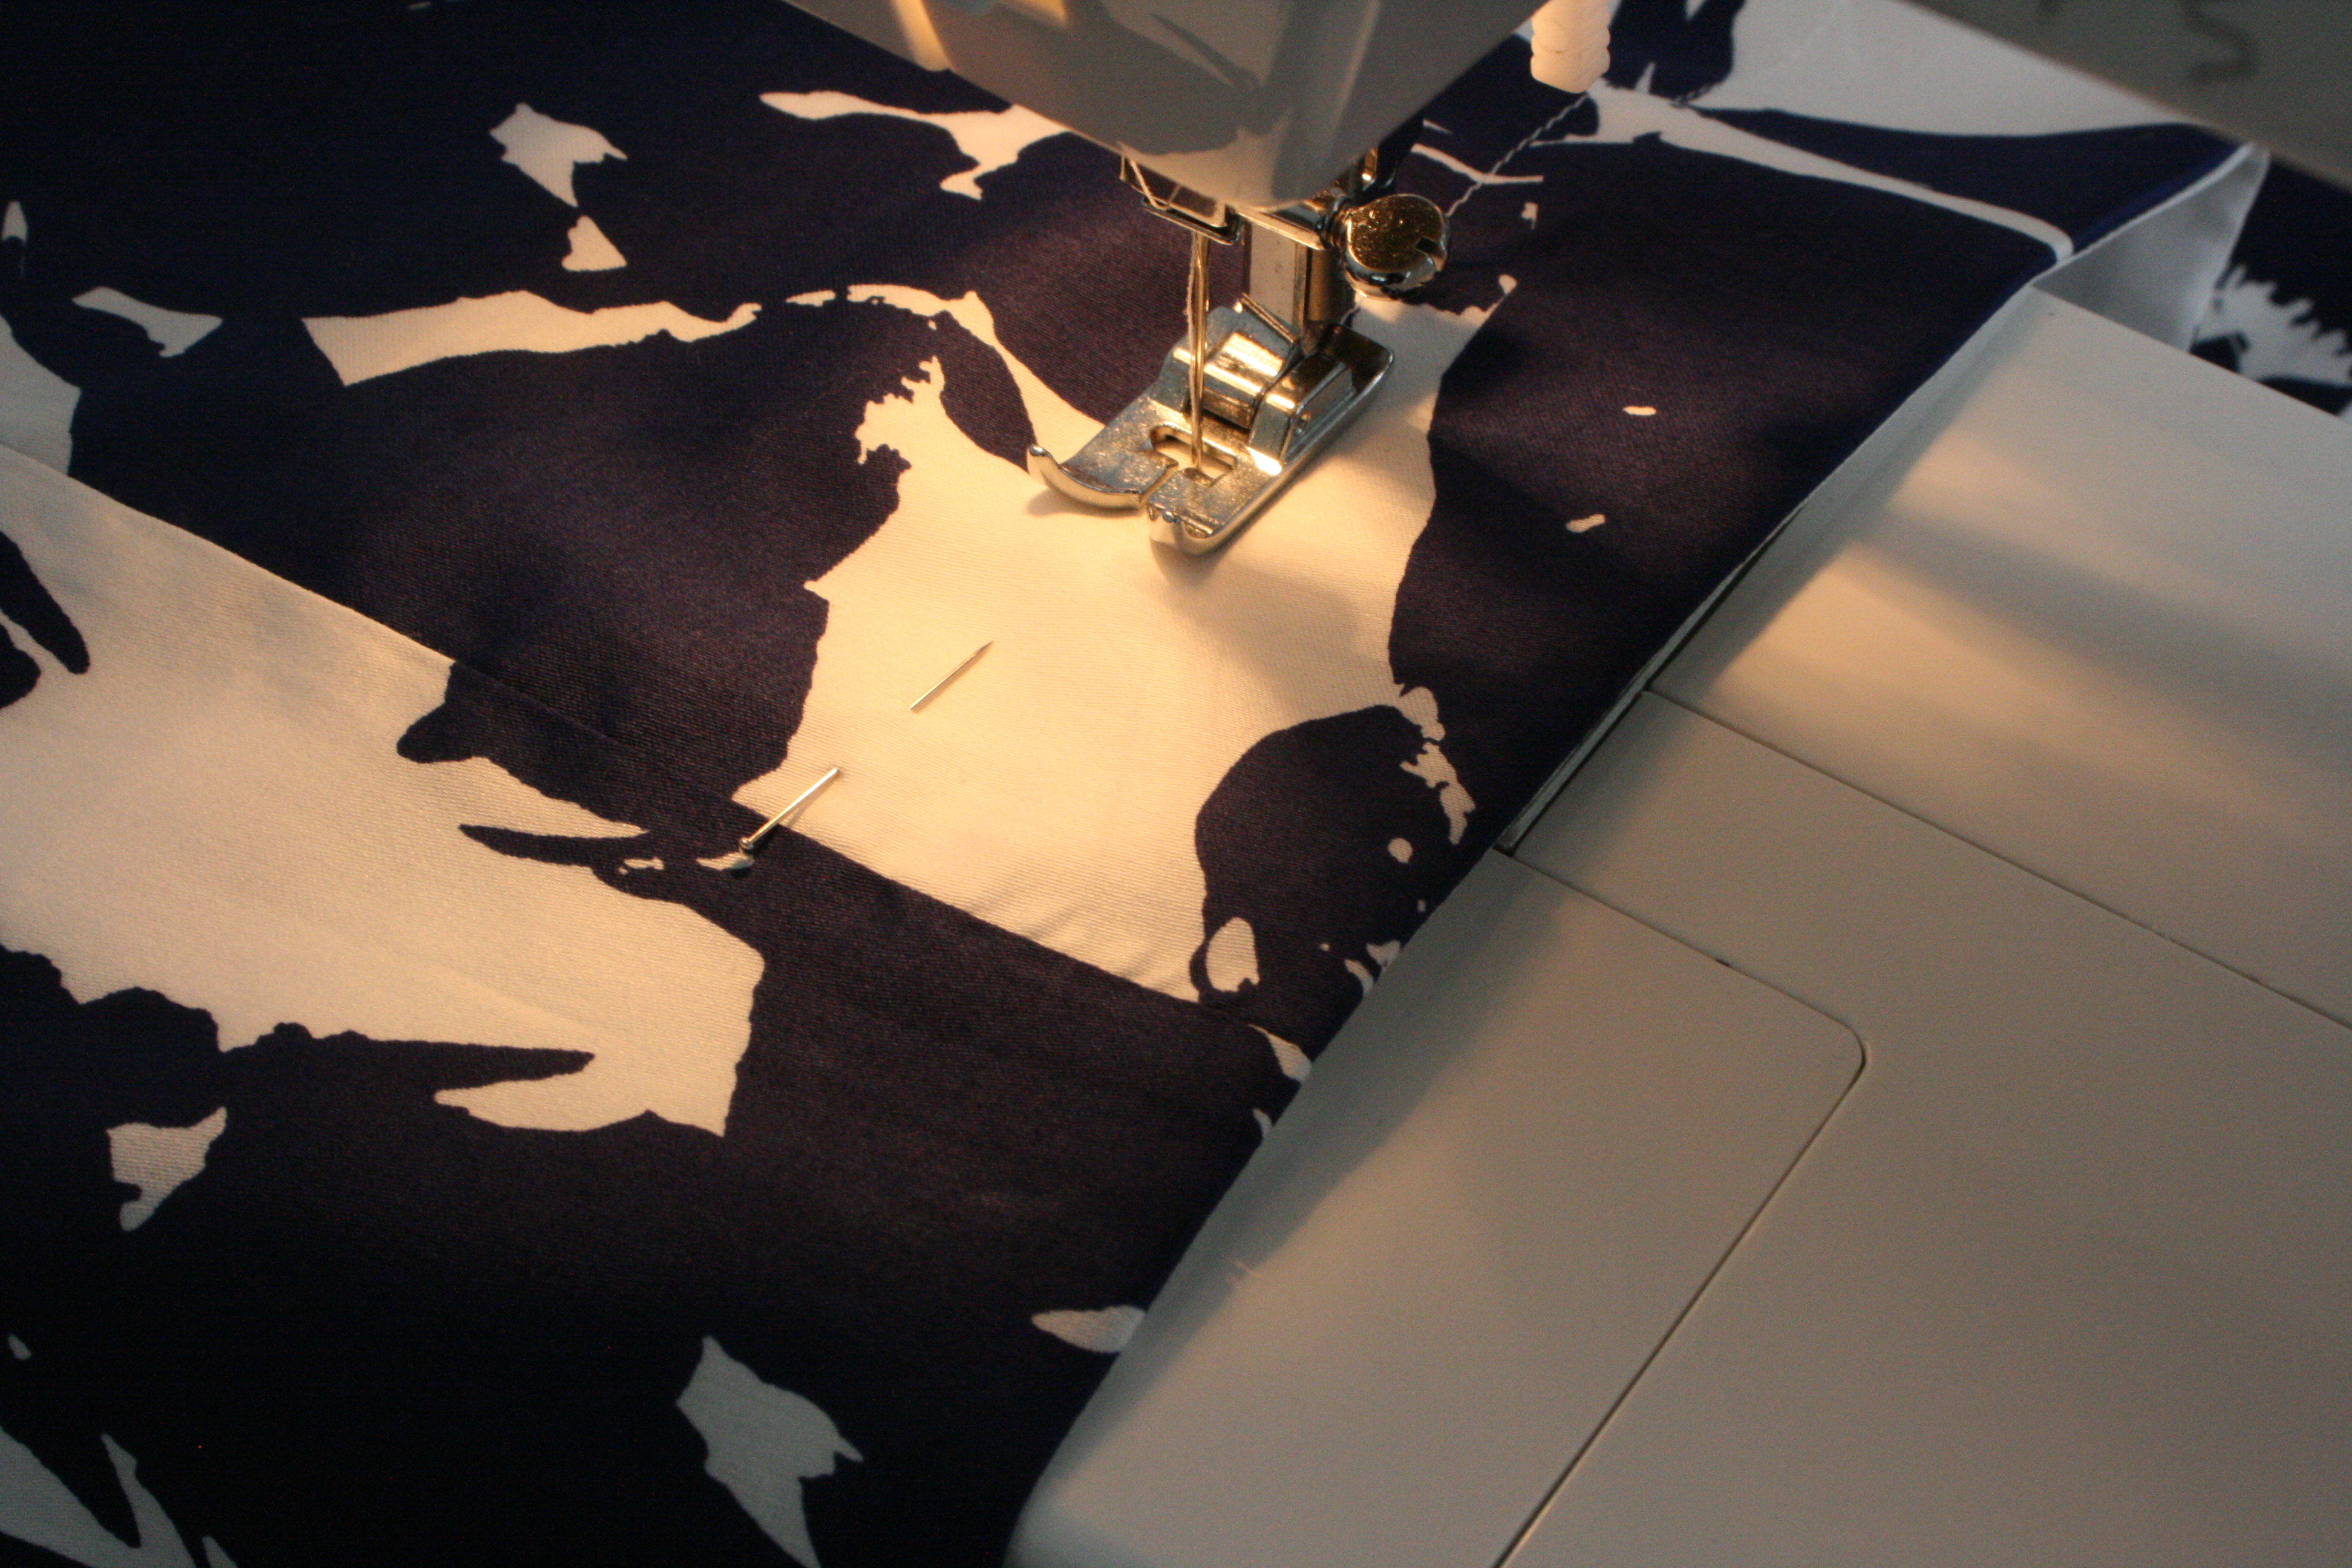
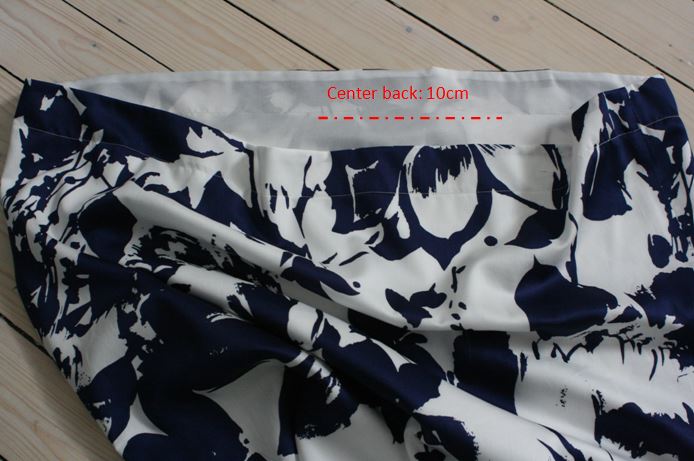
3) Stitch a tunnel at 4,5cm for the elastic band (elastic band width: 4cm ). Leave the tunnel open for 10cm at the center back to pull trough the elastic band. – stik een tunnel op 4,5cm van de rand voor de elastiek (elastiek breedte: 4cm) Laat de tunnel 10cm open op de achterzijde om de elastiek door te rijgen.

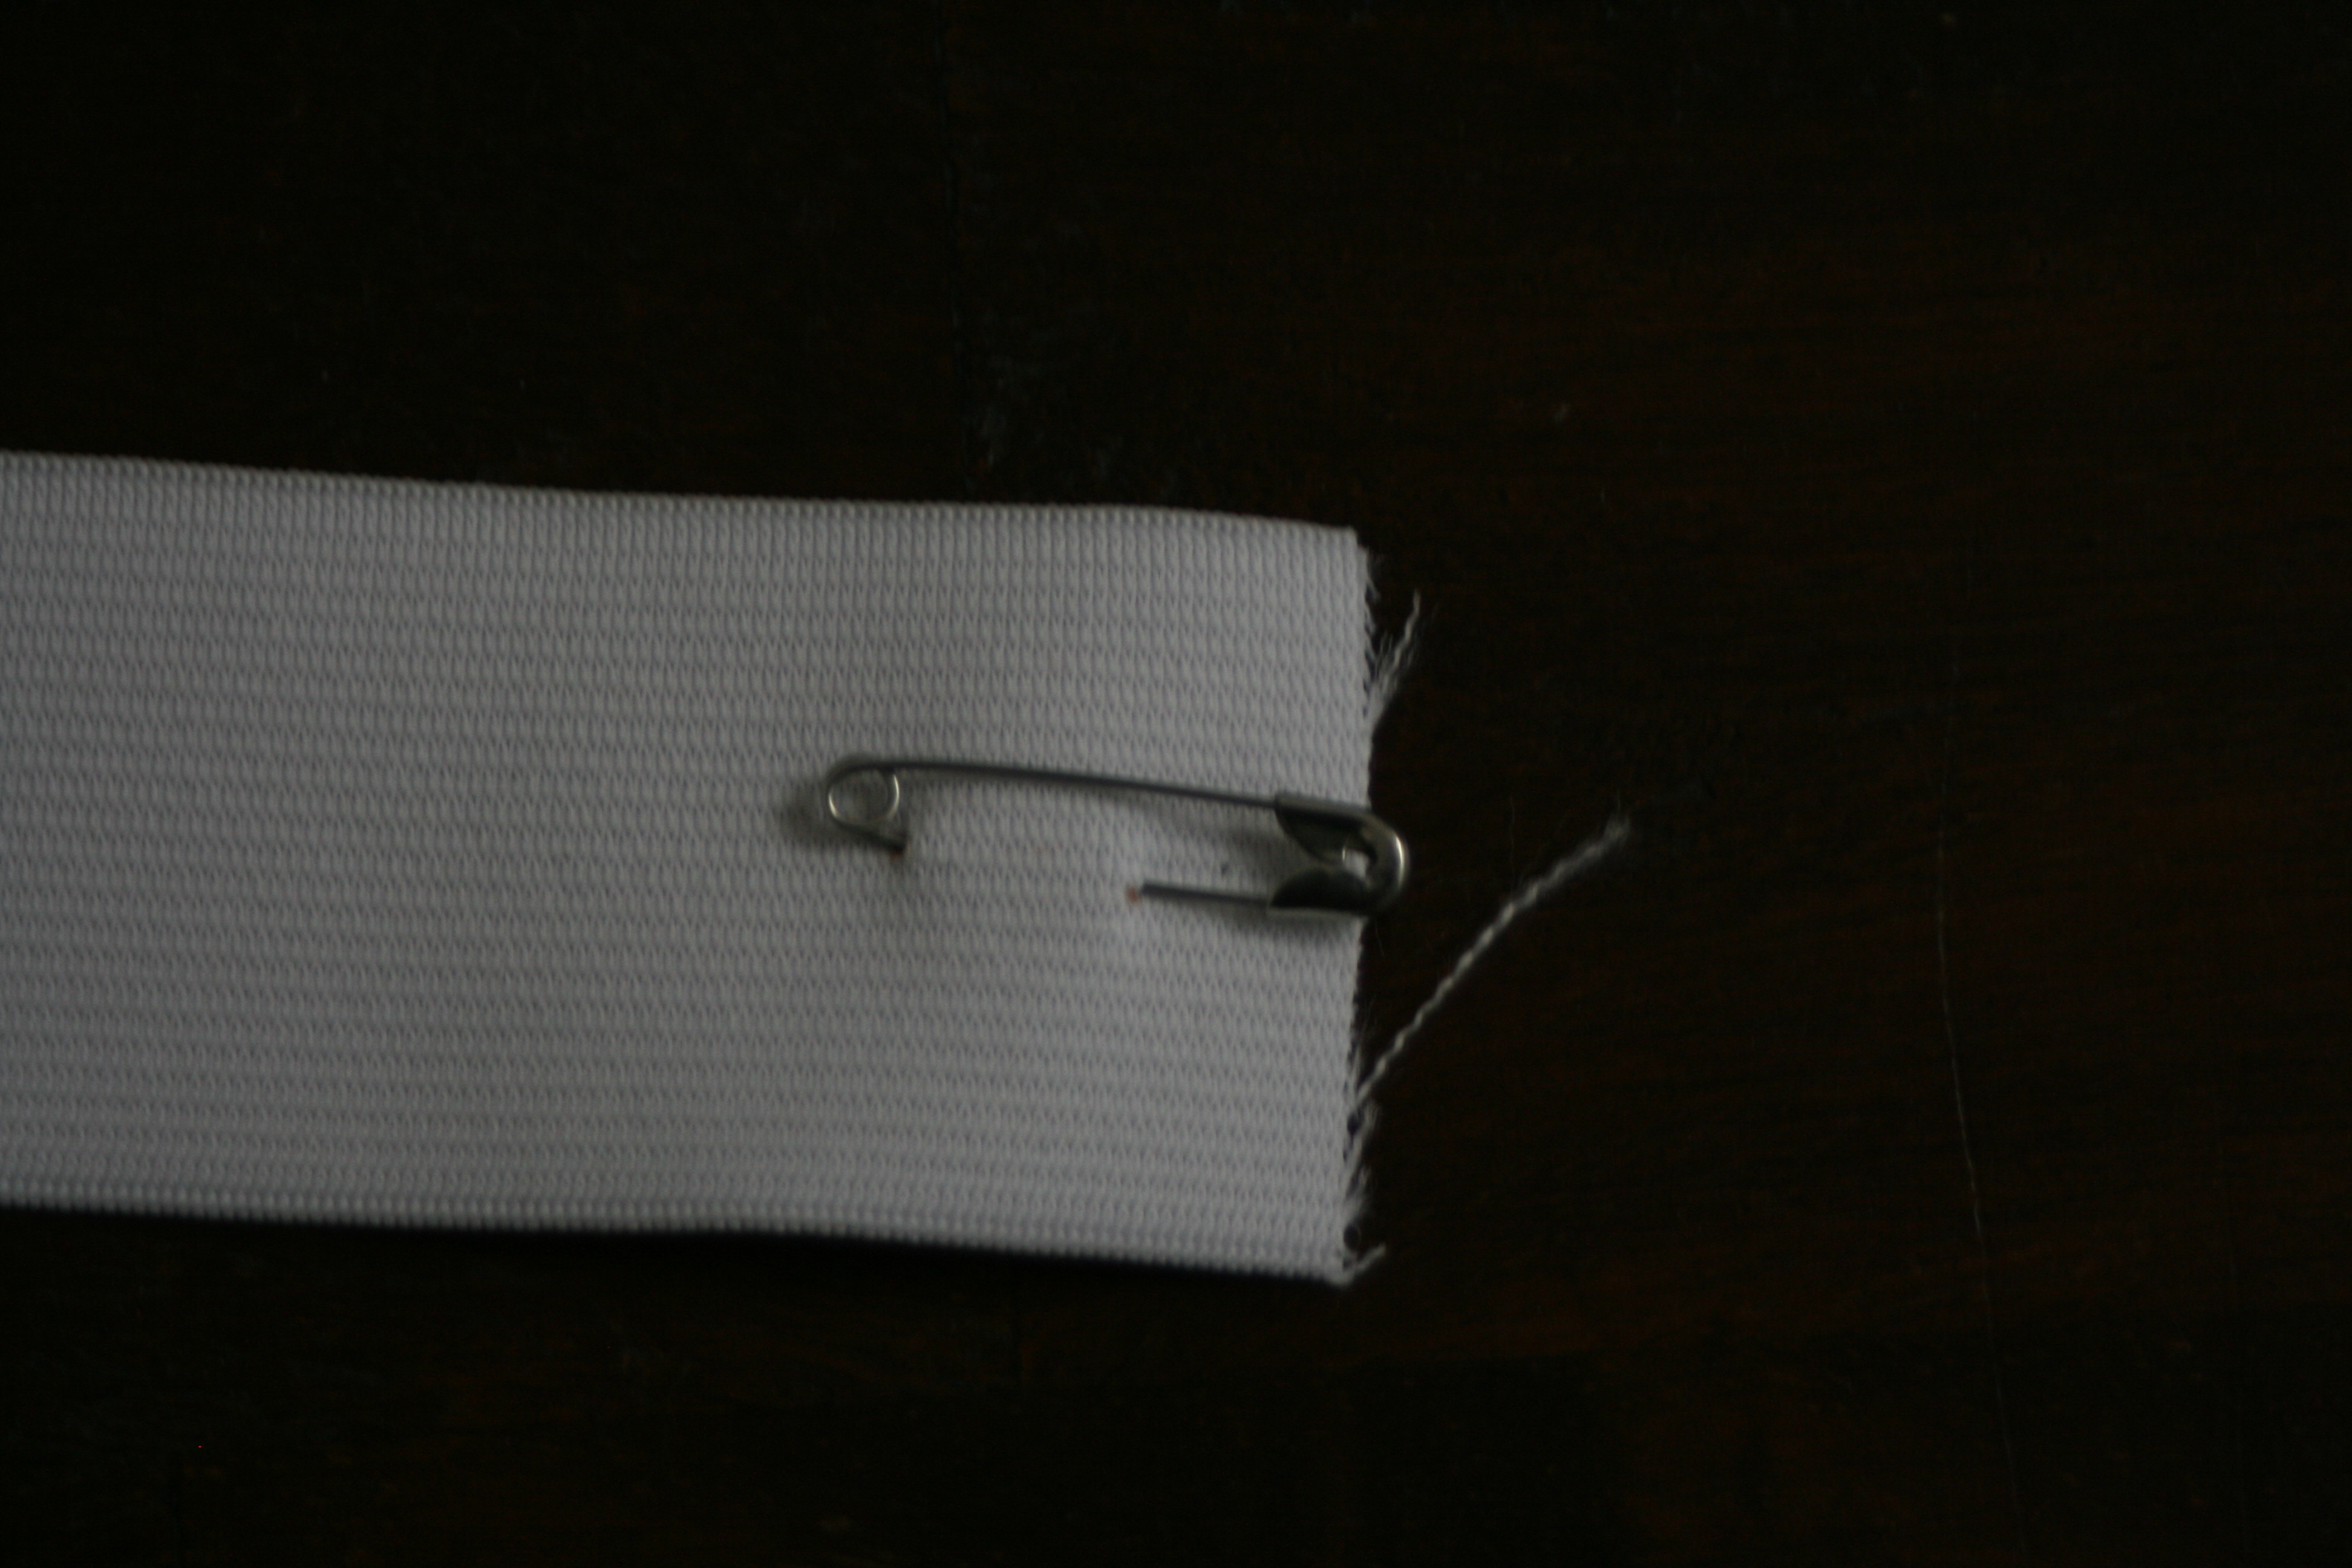

4) Measure the length for the elastic band (above chest) and cut 4cm smaller. Pull the elastic waistband trough the tunnel with a safety pin. Fix both ends of the alastic and close seam. – Meet de lengte voor de elastiek boven de borst en snij 4cm smaller. Trek de elastiek door de tunnel met een veiligheidsspeld. Fixeer beide einden van de elastiek aan elkaar.


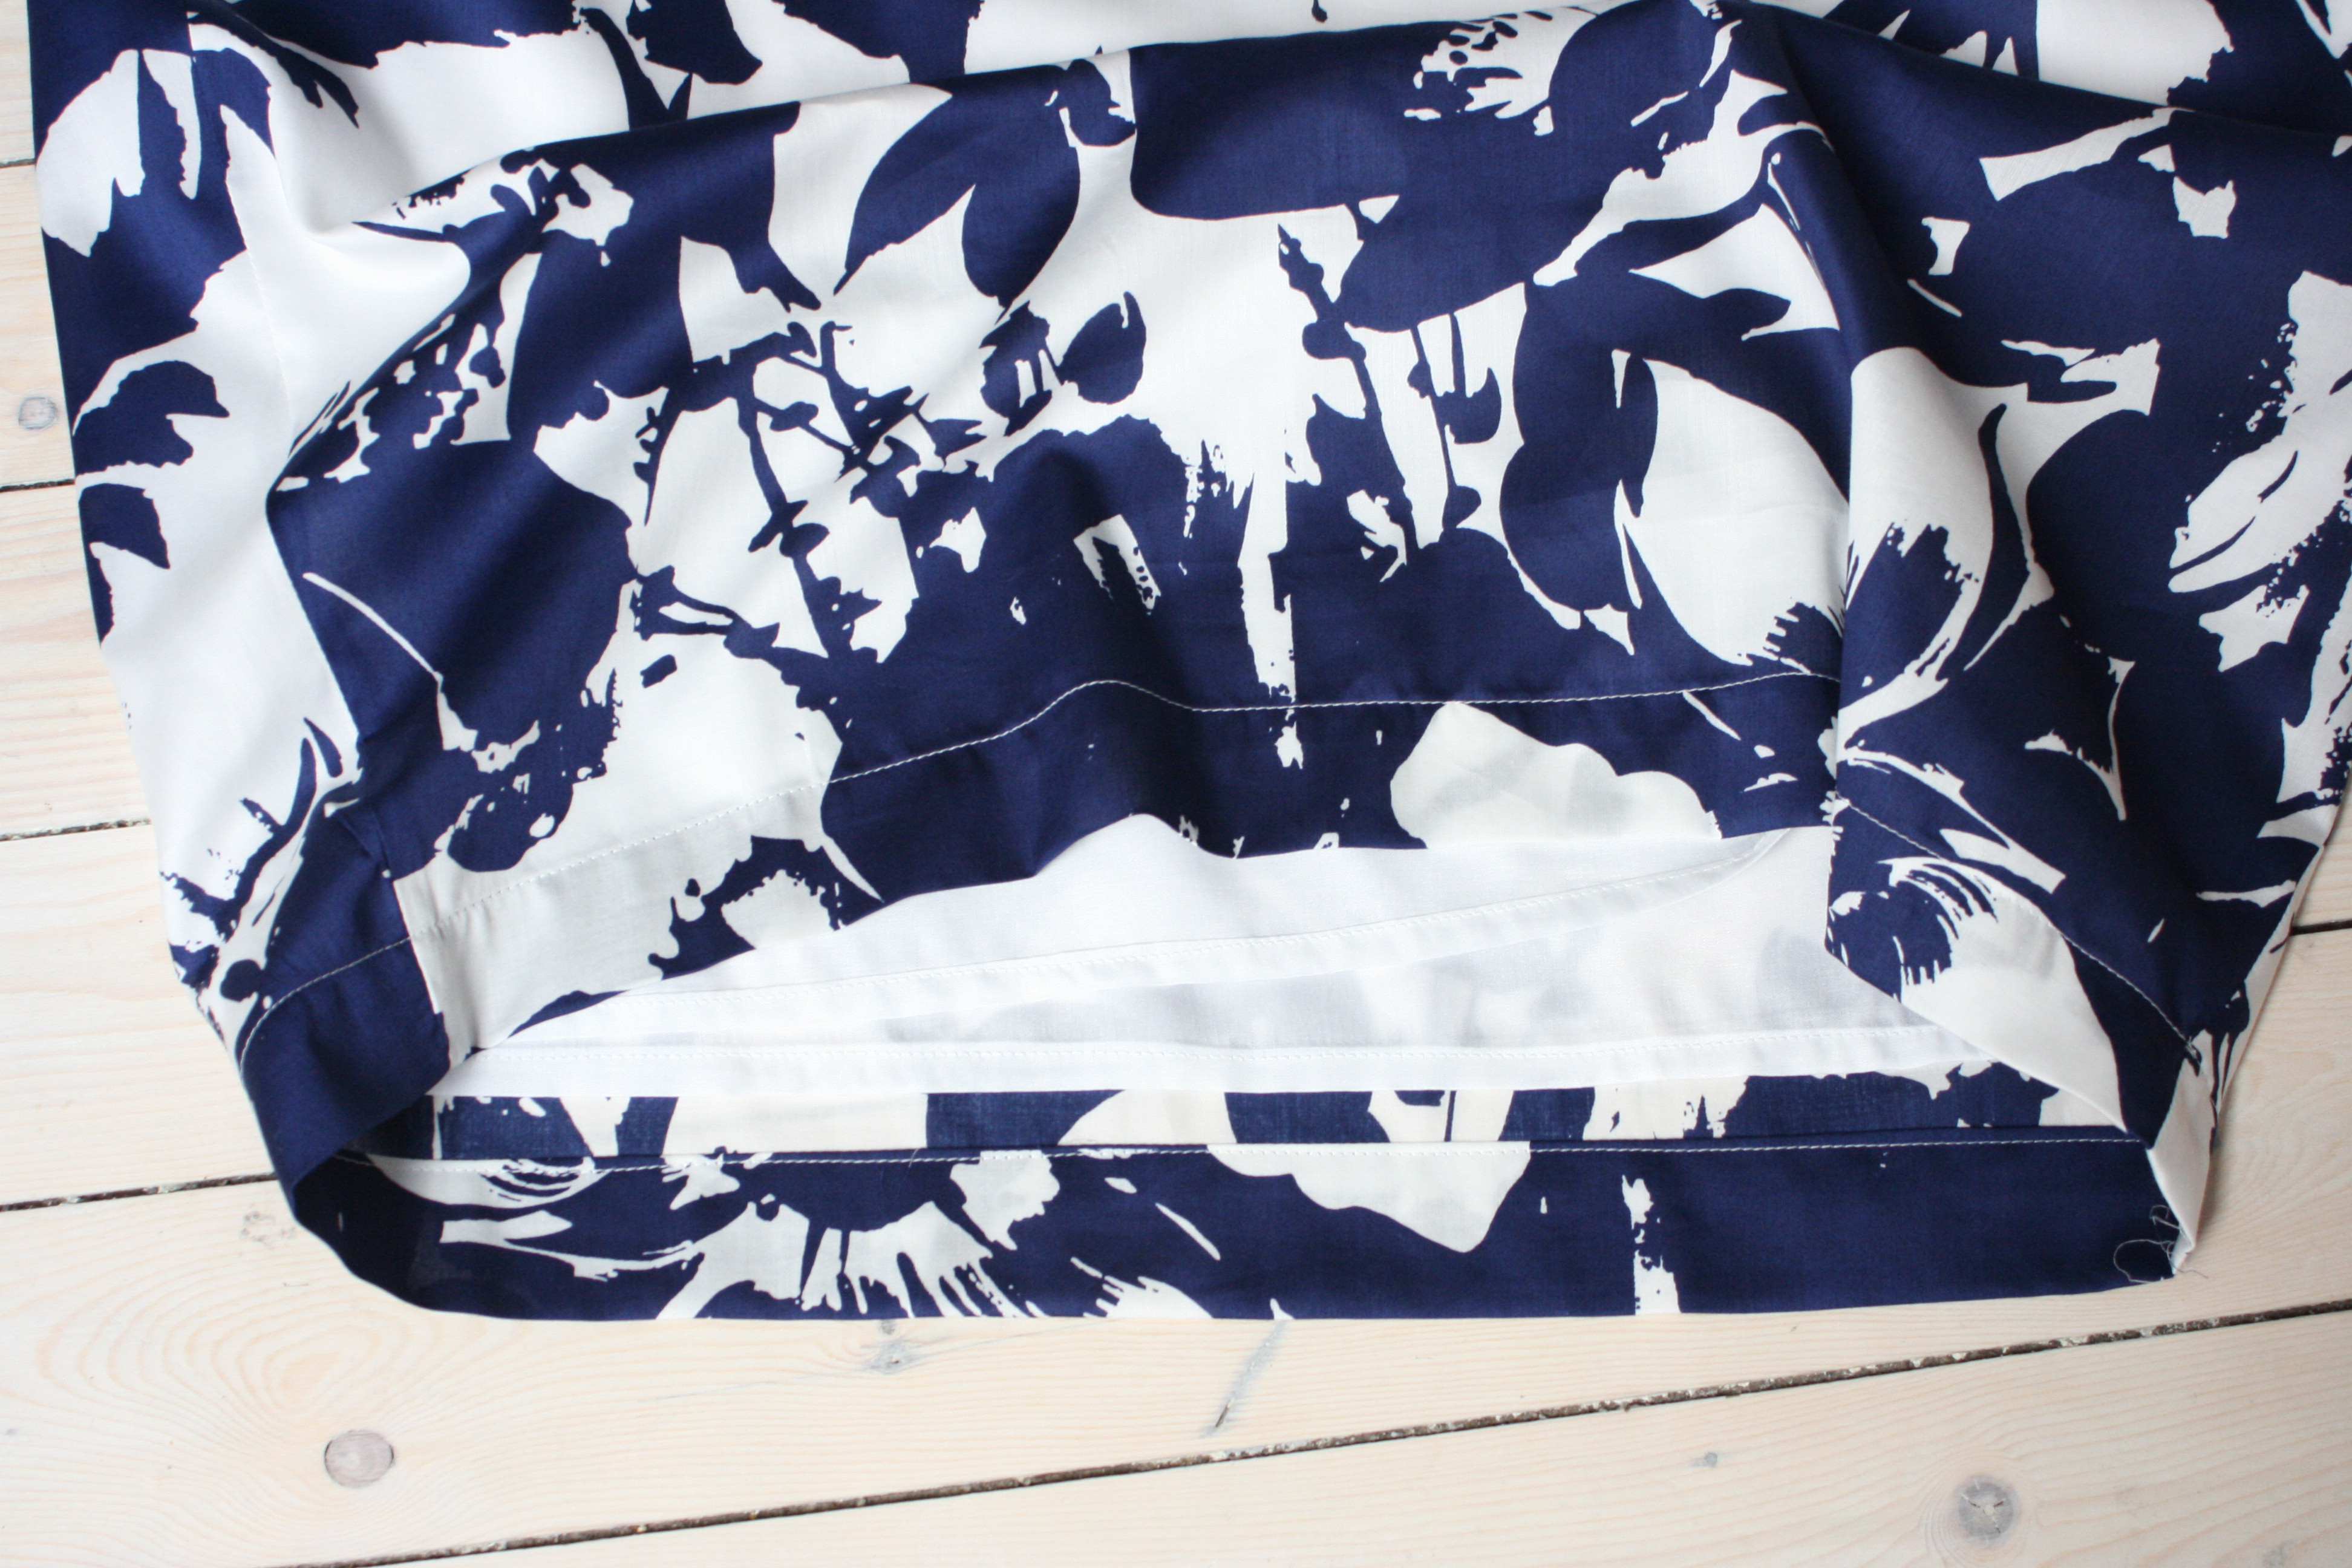
5) For my style I think the dress is to loose at the hem so I reduce width by 8cm on each side (= 32cm) – Voor mij mag de jurk best smaller onderaan dus ik versmal de zoom aan de zijde met 8cm(32cm in totaal)
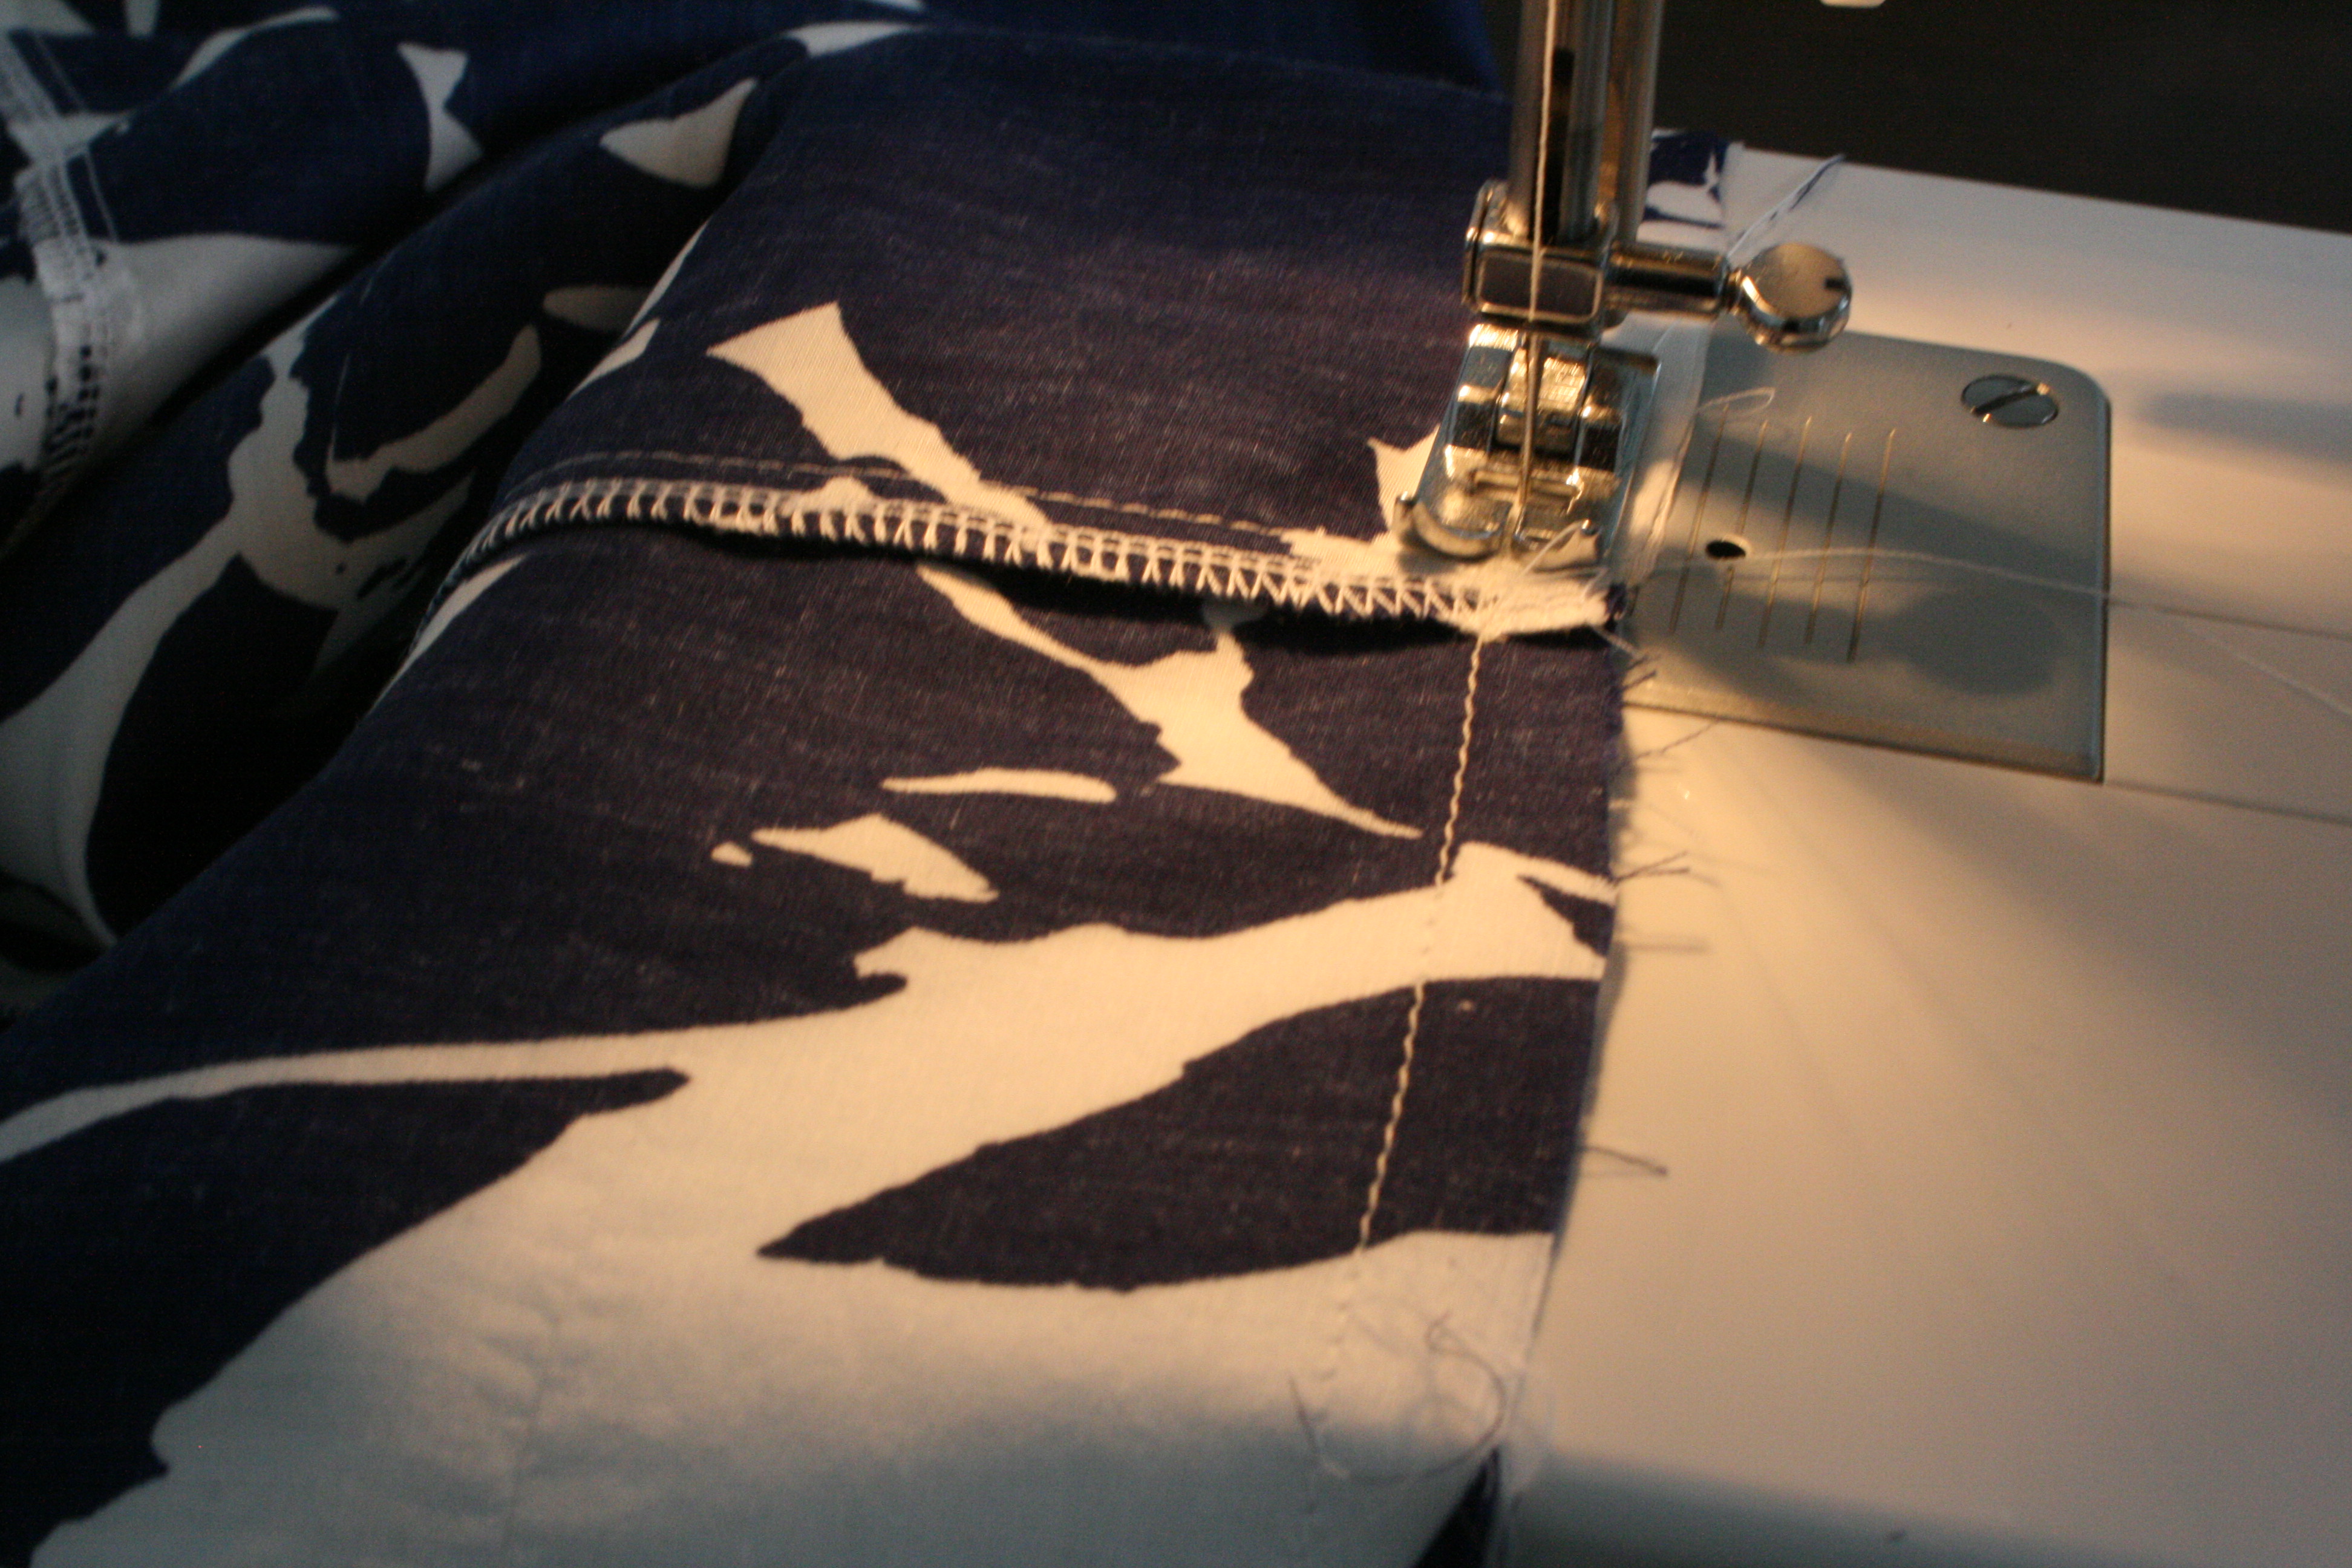
6) Finish hemlines at 1cm+4cm. The lining hemline: 1cm+ 1cm – Werk de zoom af op 4cm + 1cm. De voering zoom: 1cm + 1cm
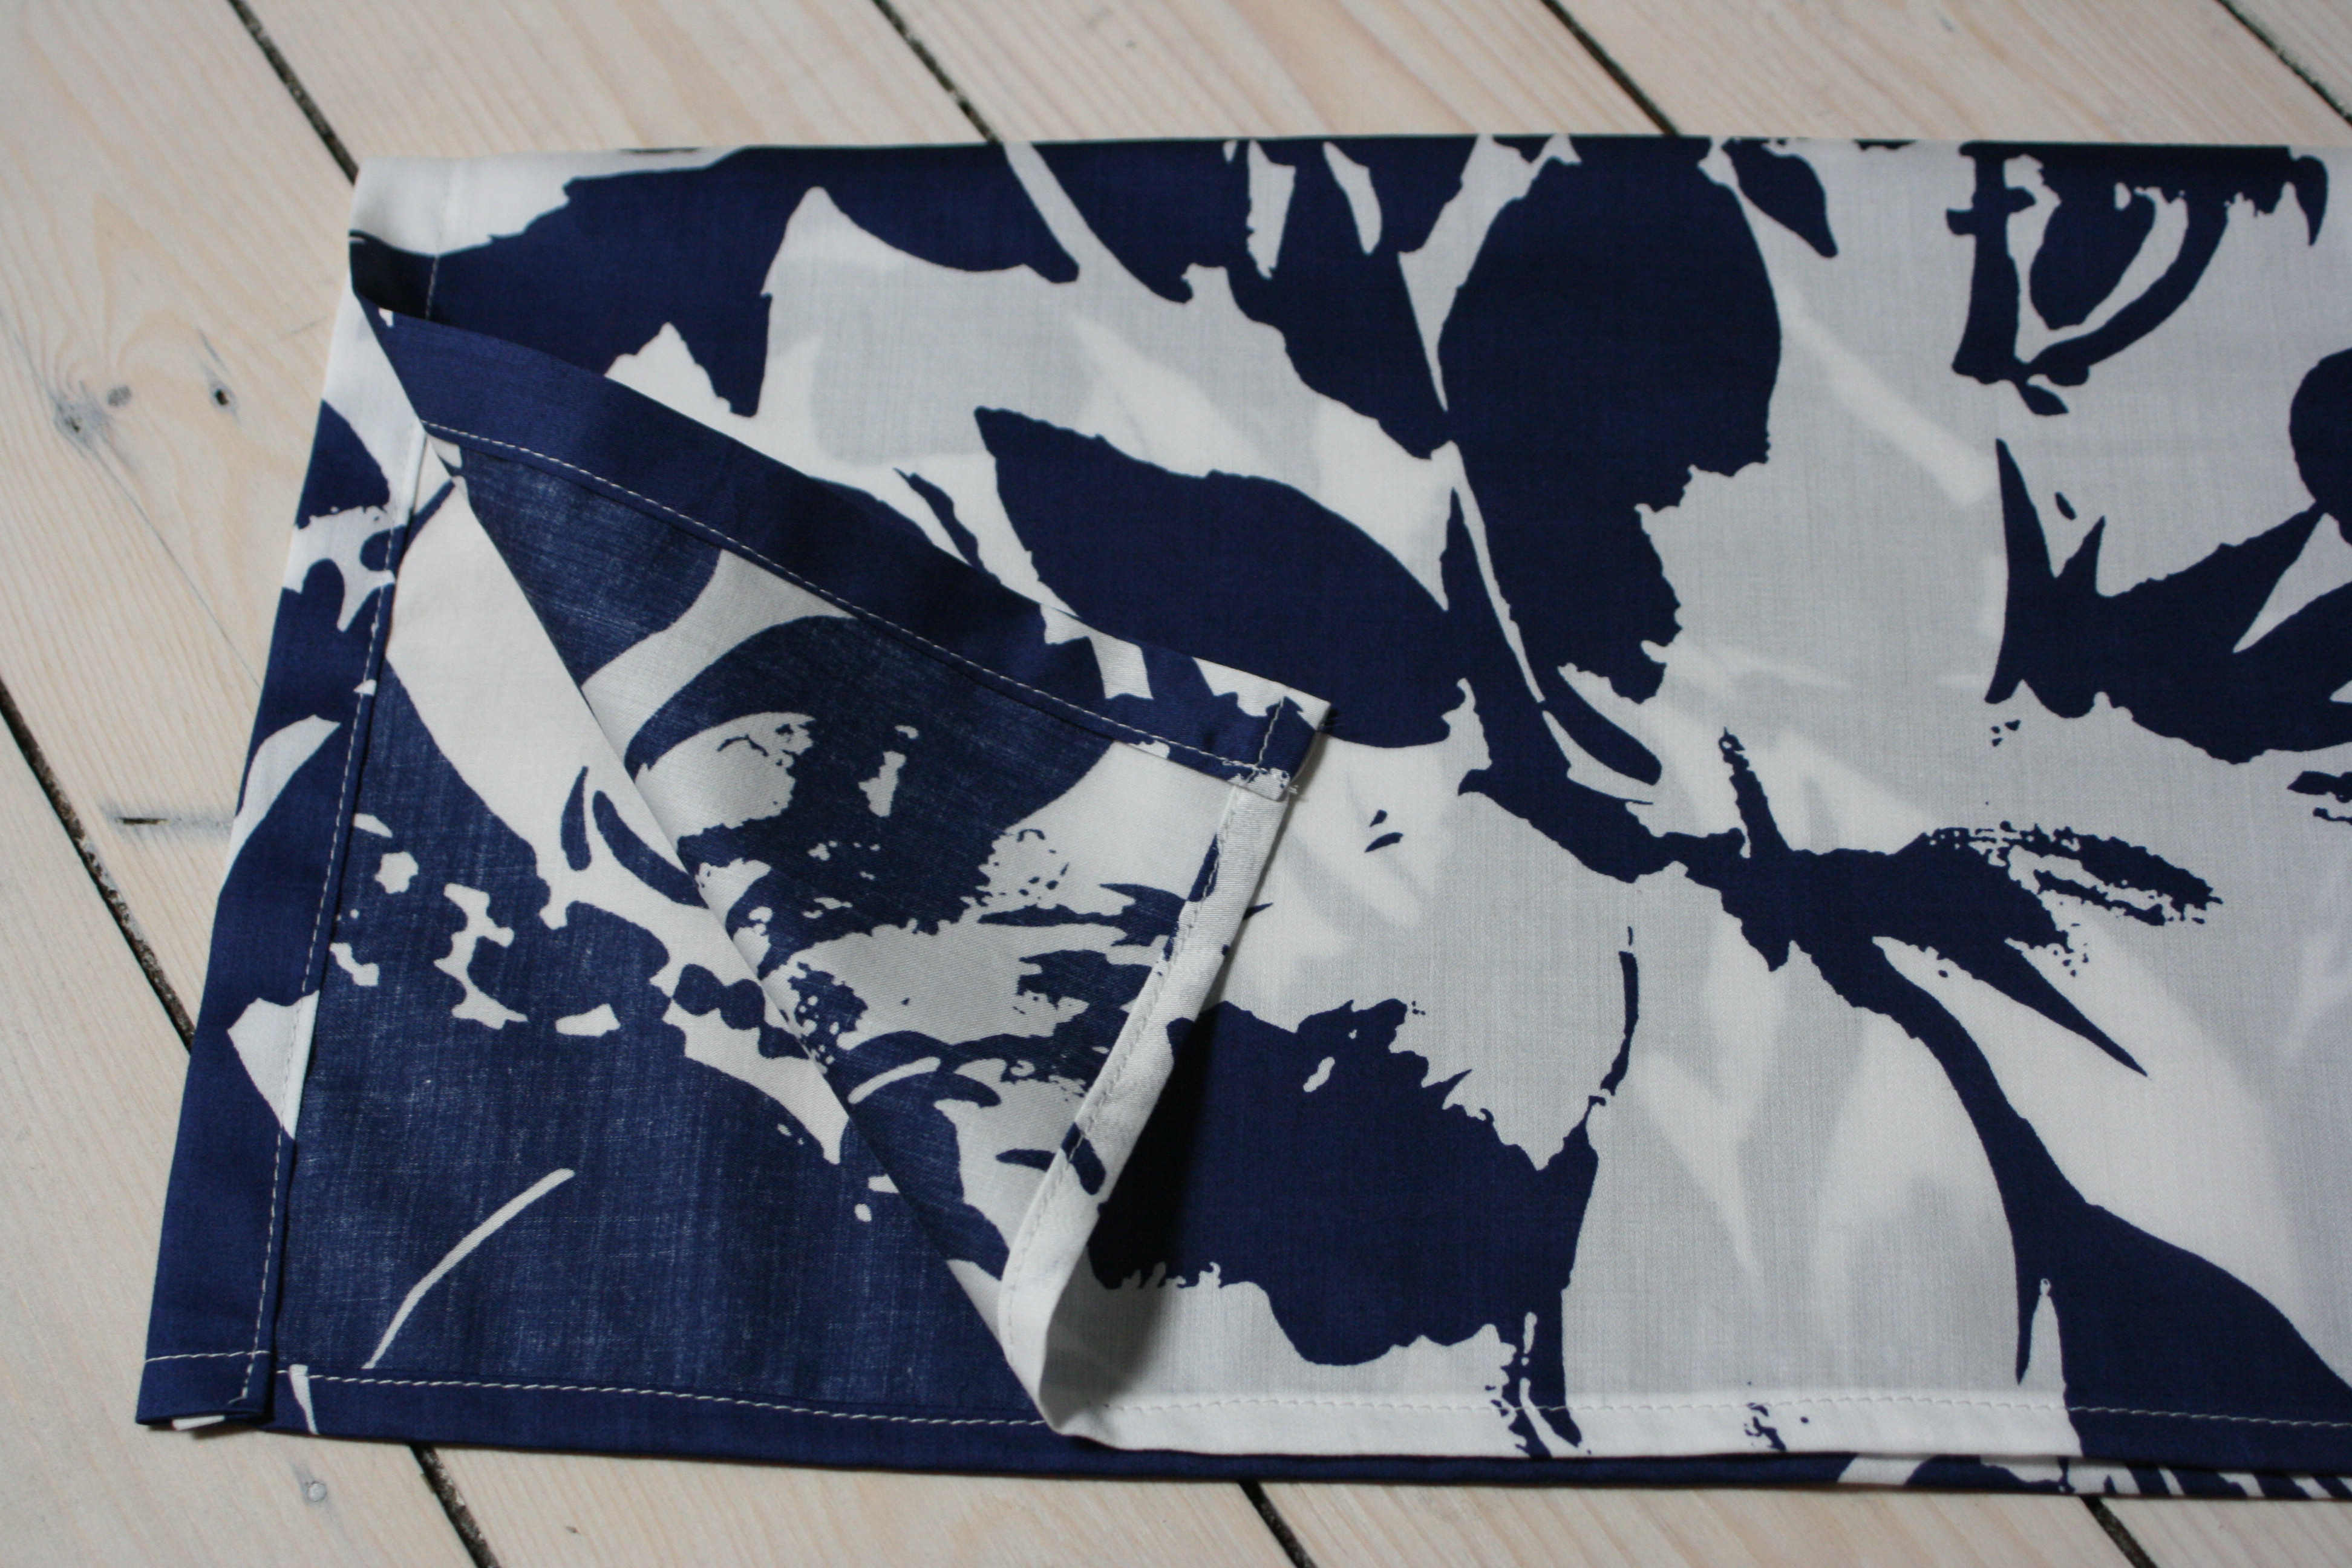

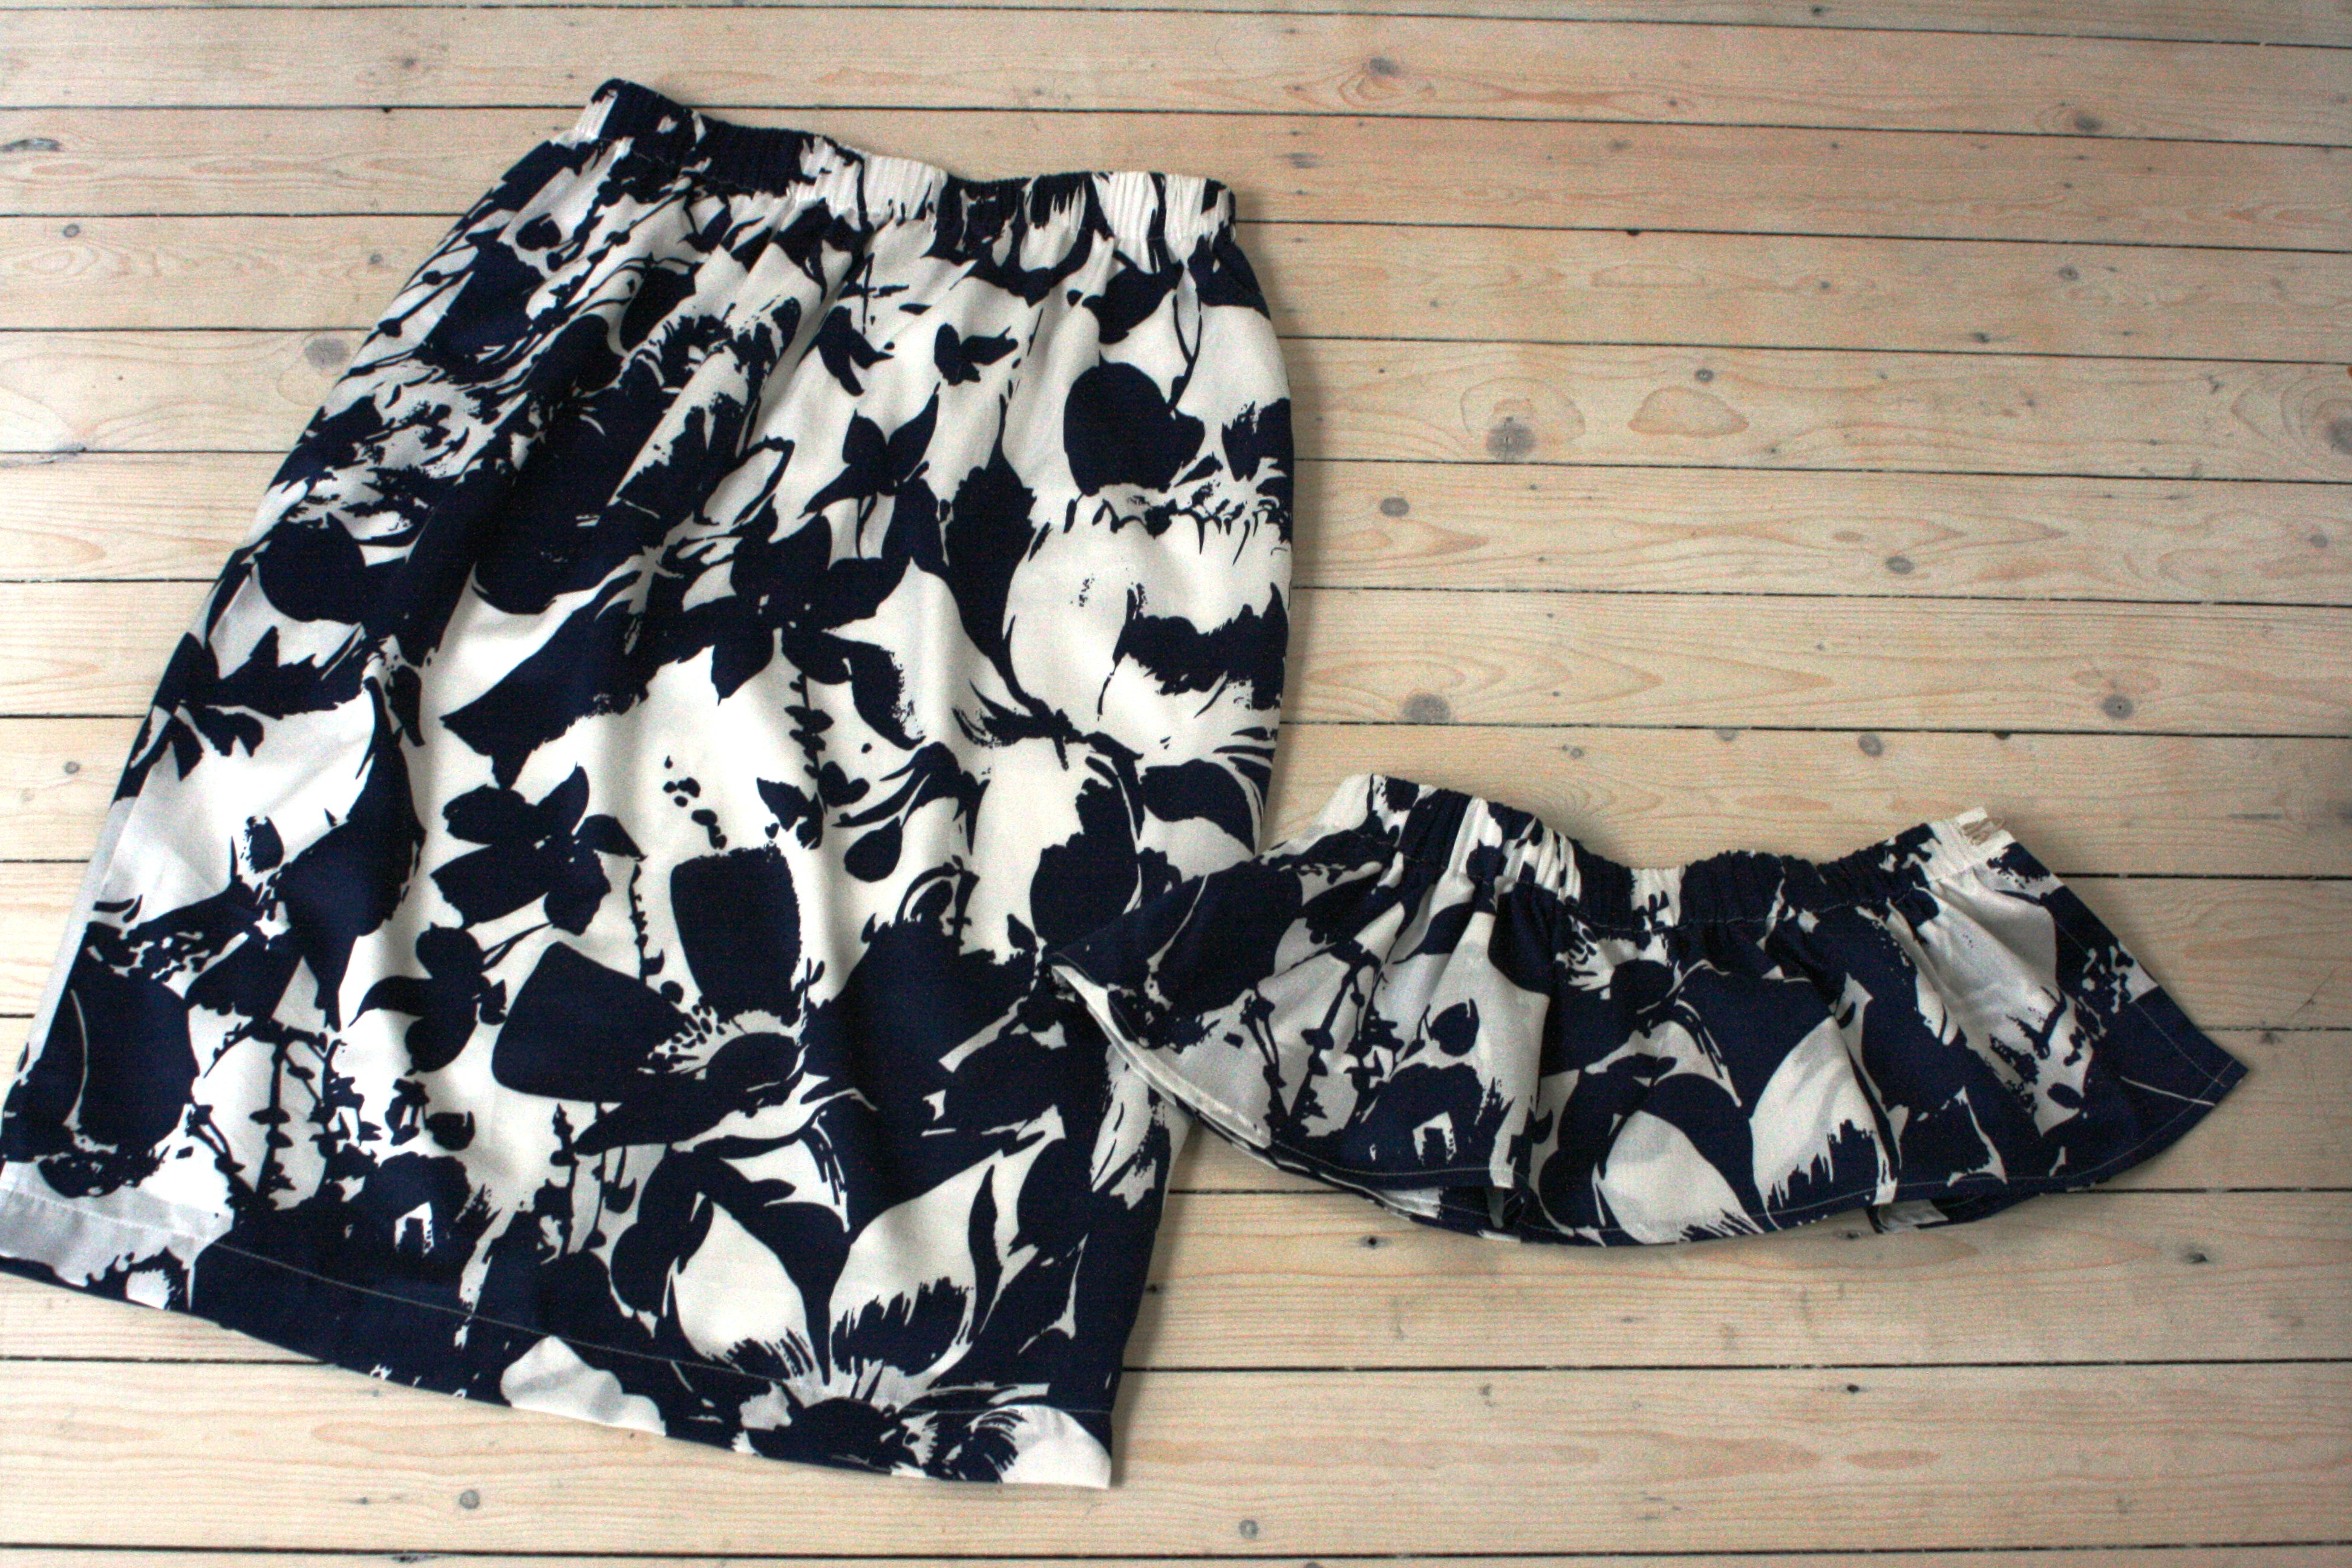
7) The peplum belt: fabric heigth: 50cm x fabric width, folded in 2 to create a tunnel for the elastic band. Make a small hemline on both sides at 1cm + 1cm. Use the same instructions as for the dress for the elastic. Sew on a hook and eye by hand – Peplum ceintuur: stofhoogte 50cm x stofbreedte, dubbelvouwen zodat er ook een tunnel ontstaat. Zomen afwerken met een rolzoom 1cm + 1cm (of smaller). Gebruikt dezelfde handleiding als bij het jurkje voor de elastiek. Naai een haak en oog aan de binnenzijde om de ceintuur te sluiten.